R12.1 Project Publication-2025Dec23
Insert a Table
The Table stencil allows you to create structured content with enhanced layout and editing features.
- Drag and drop individual rows or columns to rearrange them.
- Resize rows and columns to improve content fit without disrupting the overall layout.
- Existing tables are automatically converted to the updated format to support improved layout and editing features.
The table stencil has more functionalities listed as follows:
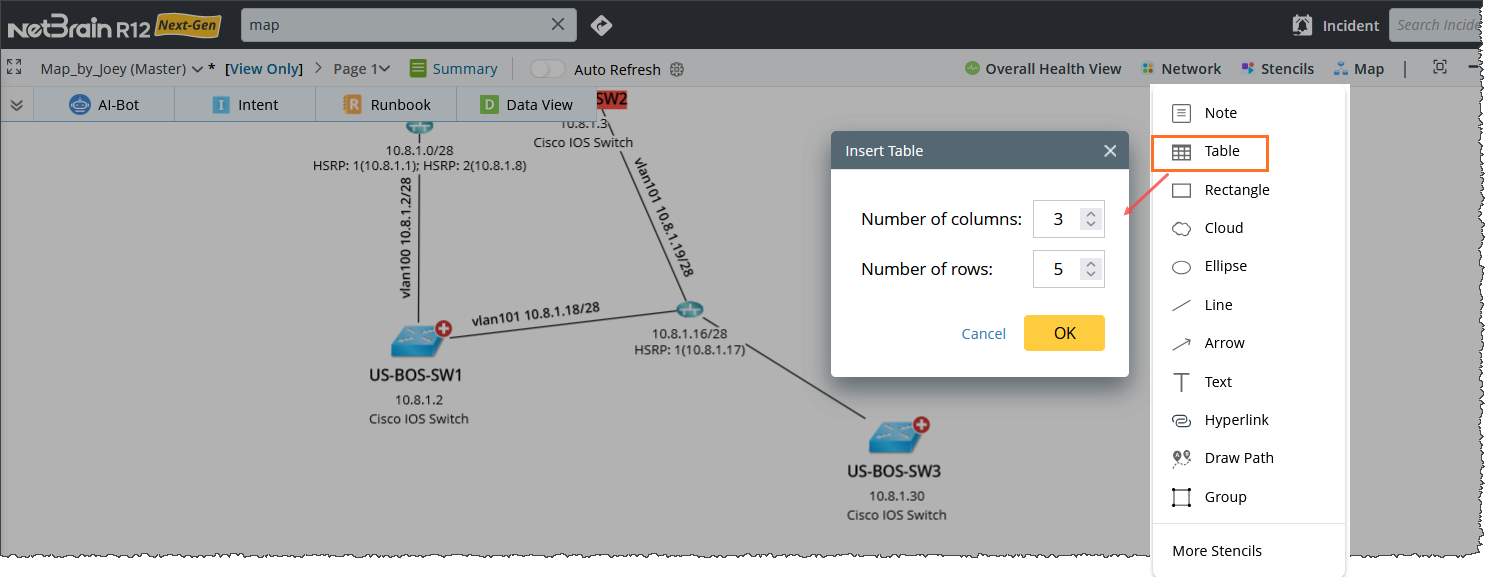
- Upon choosing the Table from the Stencils menu, adjust the numbers for columns/rows in the popped-up window Insert Table and click OK to add the table on the map.
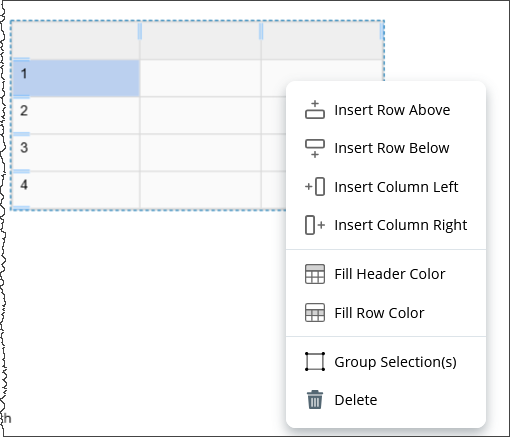
- The following functionalities (as shown in the image) are available in the Table right-click menu.
-
Insert Row above/Below and Insert Column Left/Right: The Addition of Rows and Columns options appear further when hovering the mouse.
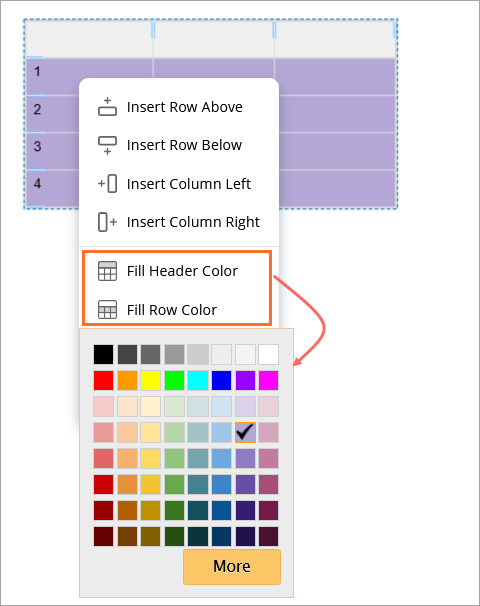
- Fill Header Color and Fill Row Color: Select any of the two options, and a color palette will appear on screen. Choose the color to fill the cells.
-
Insert Row above/Below and Insert Column Left/Right: The Addition of Rows and Columns options appear further when hovering the mouse.
- Table cell right-click menu: Double click on a cell to open the editing mode, and right-click to view the cell properties menu:
-
Insert or Delete a Column or Row.
- Modify the Color of the cell background: Click on the icon to open the color palette.
- Adjust vertical alignment of the text in the cell: Top, Middle, Bottom
-
Insert or Delete a Column or Row.
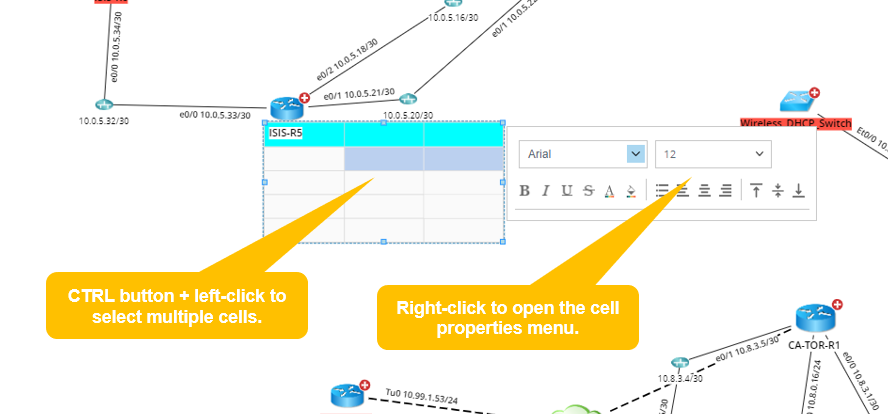
- You can modify multiple cells in a batch:
- Hold Ctrl and select the desired cells.
- Right-click to open the cell properties menu.
- Edit font, color, alignment, and other properties as needed.