Schedule Qapp
Example: Create a scheduled task to run the Qapp Overall Health Check [SNMP] from scratch.
-
Log in to the Domain Management page.

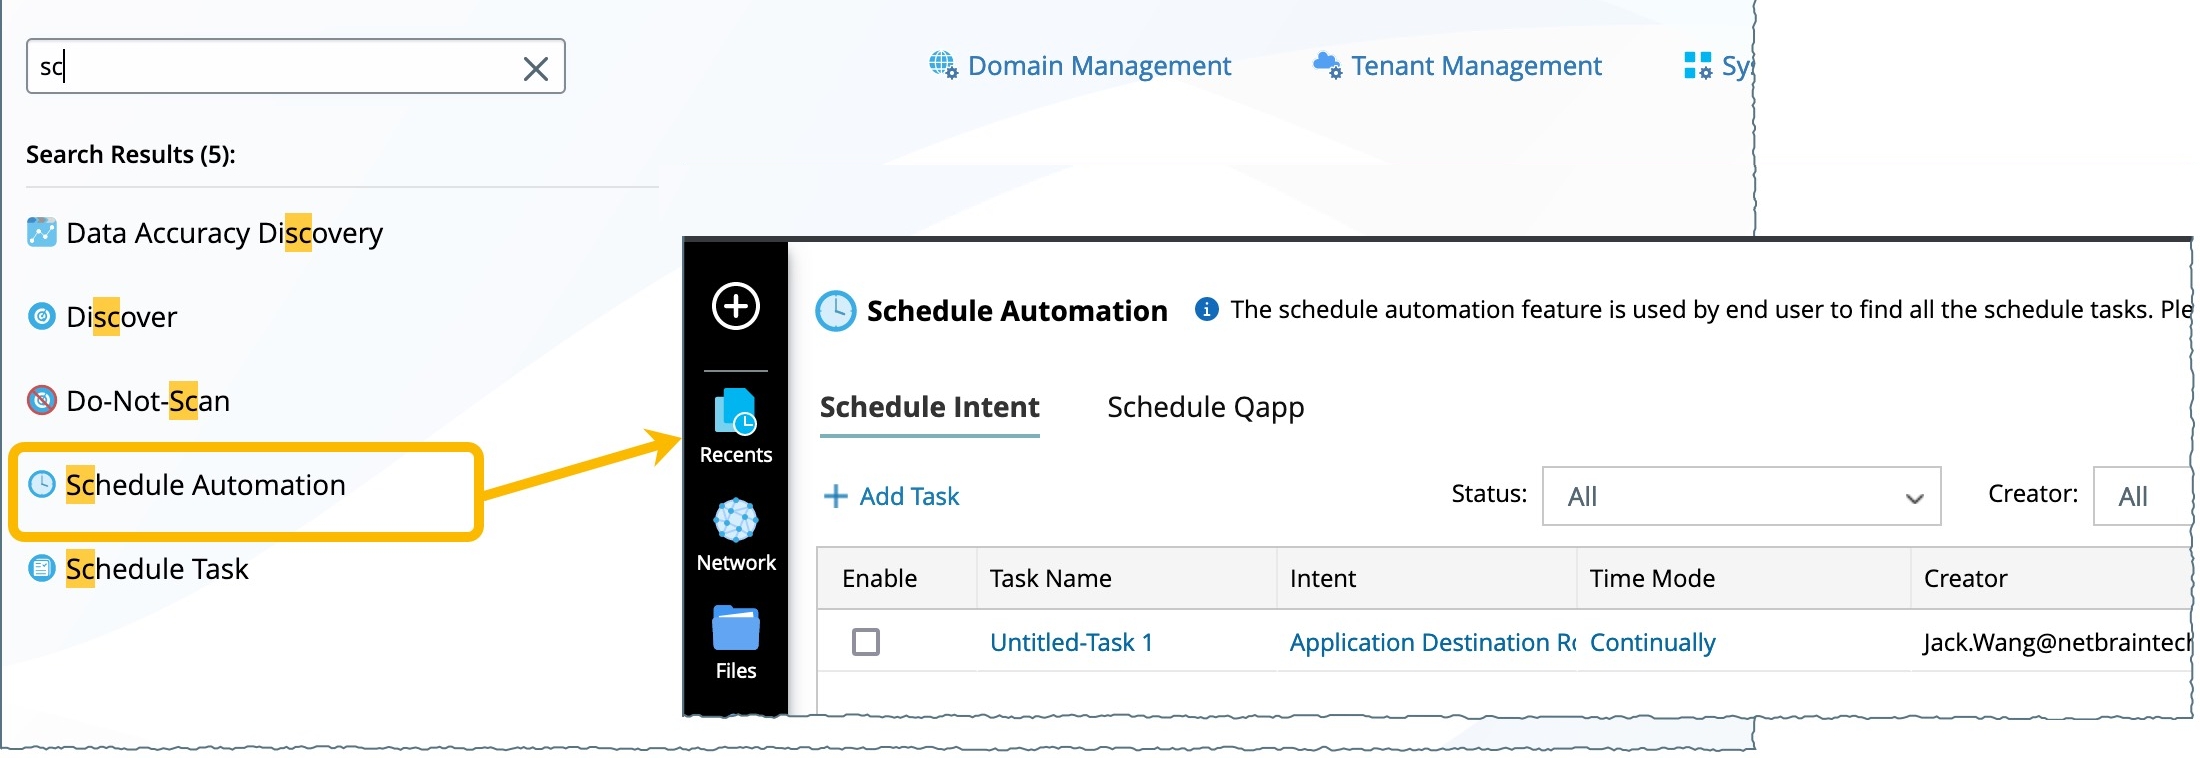
Tip: Schedule Qapp can also be accessed by clicking Start menu > Search for Schedule Automation.
-
In the Domain Management page, click Schedule Task on the Start Page or select Schedule Task from the navigation menu by clicking the
 icon on the left .
-
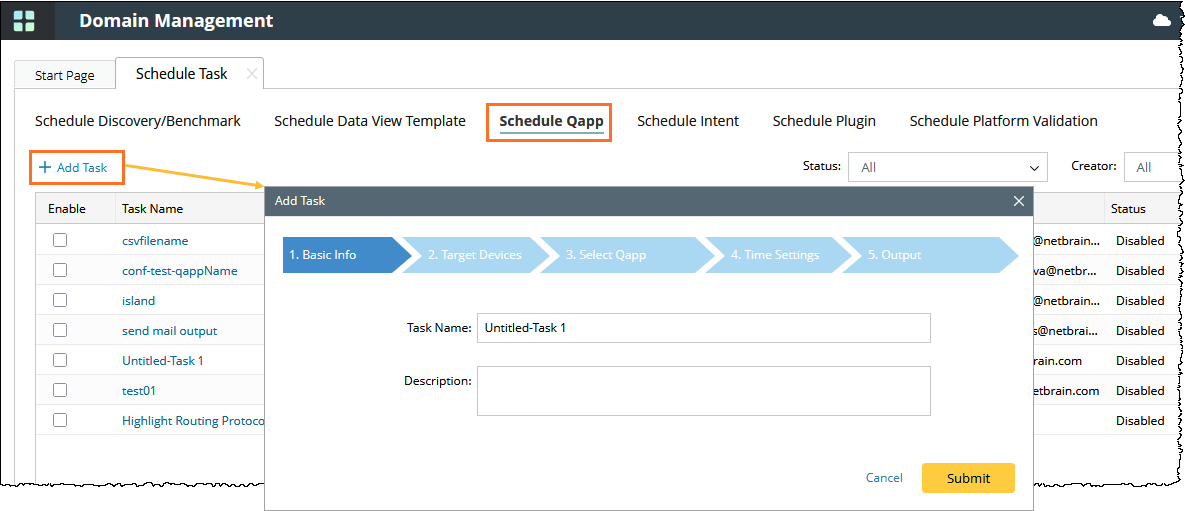
On the Schedule Qapp tab, click Add Task.
-
Follow the wizard to configure the Qapp task.
-
On the Basic Info tab, enter the task name Basic Health Check [SNMP].
-
On the Target Devices tab, select Add Site > My Network, and click OK.
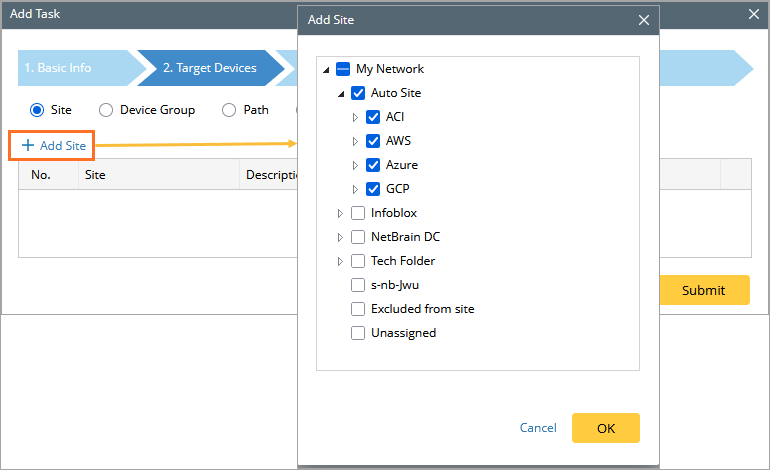
Tip: If you select an existing path, the devices along this path will be treated as target devices when the path is successfully calculated. -
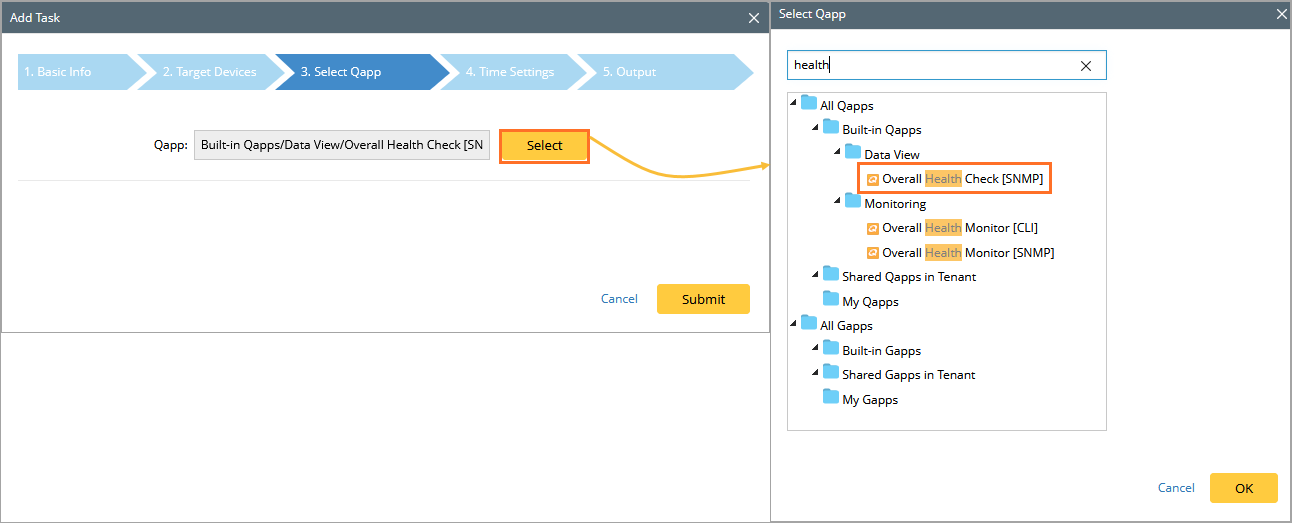
On the Select Qapp tab, click Select and choose the Overall Health Check [SNMP] Qapp, then click OK.
-
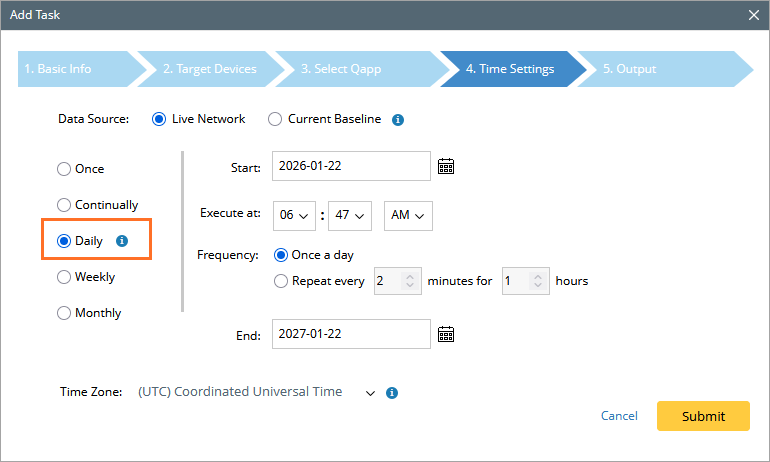
On the Time Settings tab, set the data source, execution time and frequency. In this case, set the frequency to Daily.
Note:
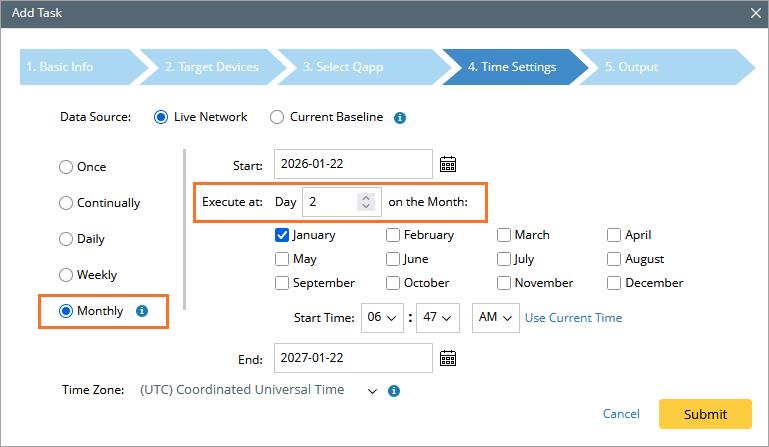
Qapps can be scheduled to run monthly. When configuring a monthly schedule, you can specify:-
The month and time when the Qapp runs
-
The day of the month (from 1 to 31)
Note: For the data source, if you select the Current Baseline, you should make sure there is historical data.
Note: The time zone settings refer to the time zone of NetBrain Web Server. -
-
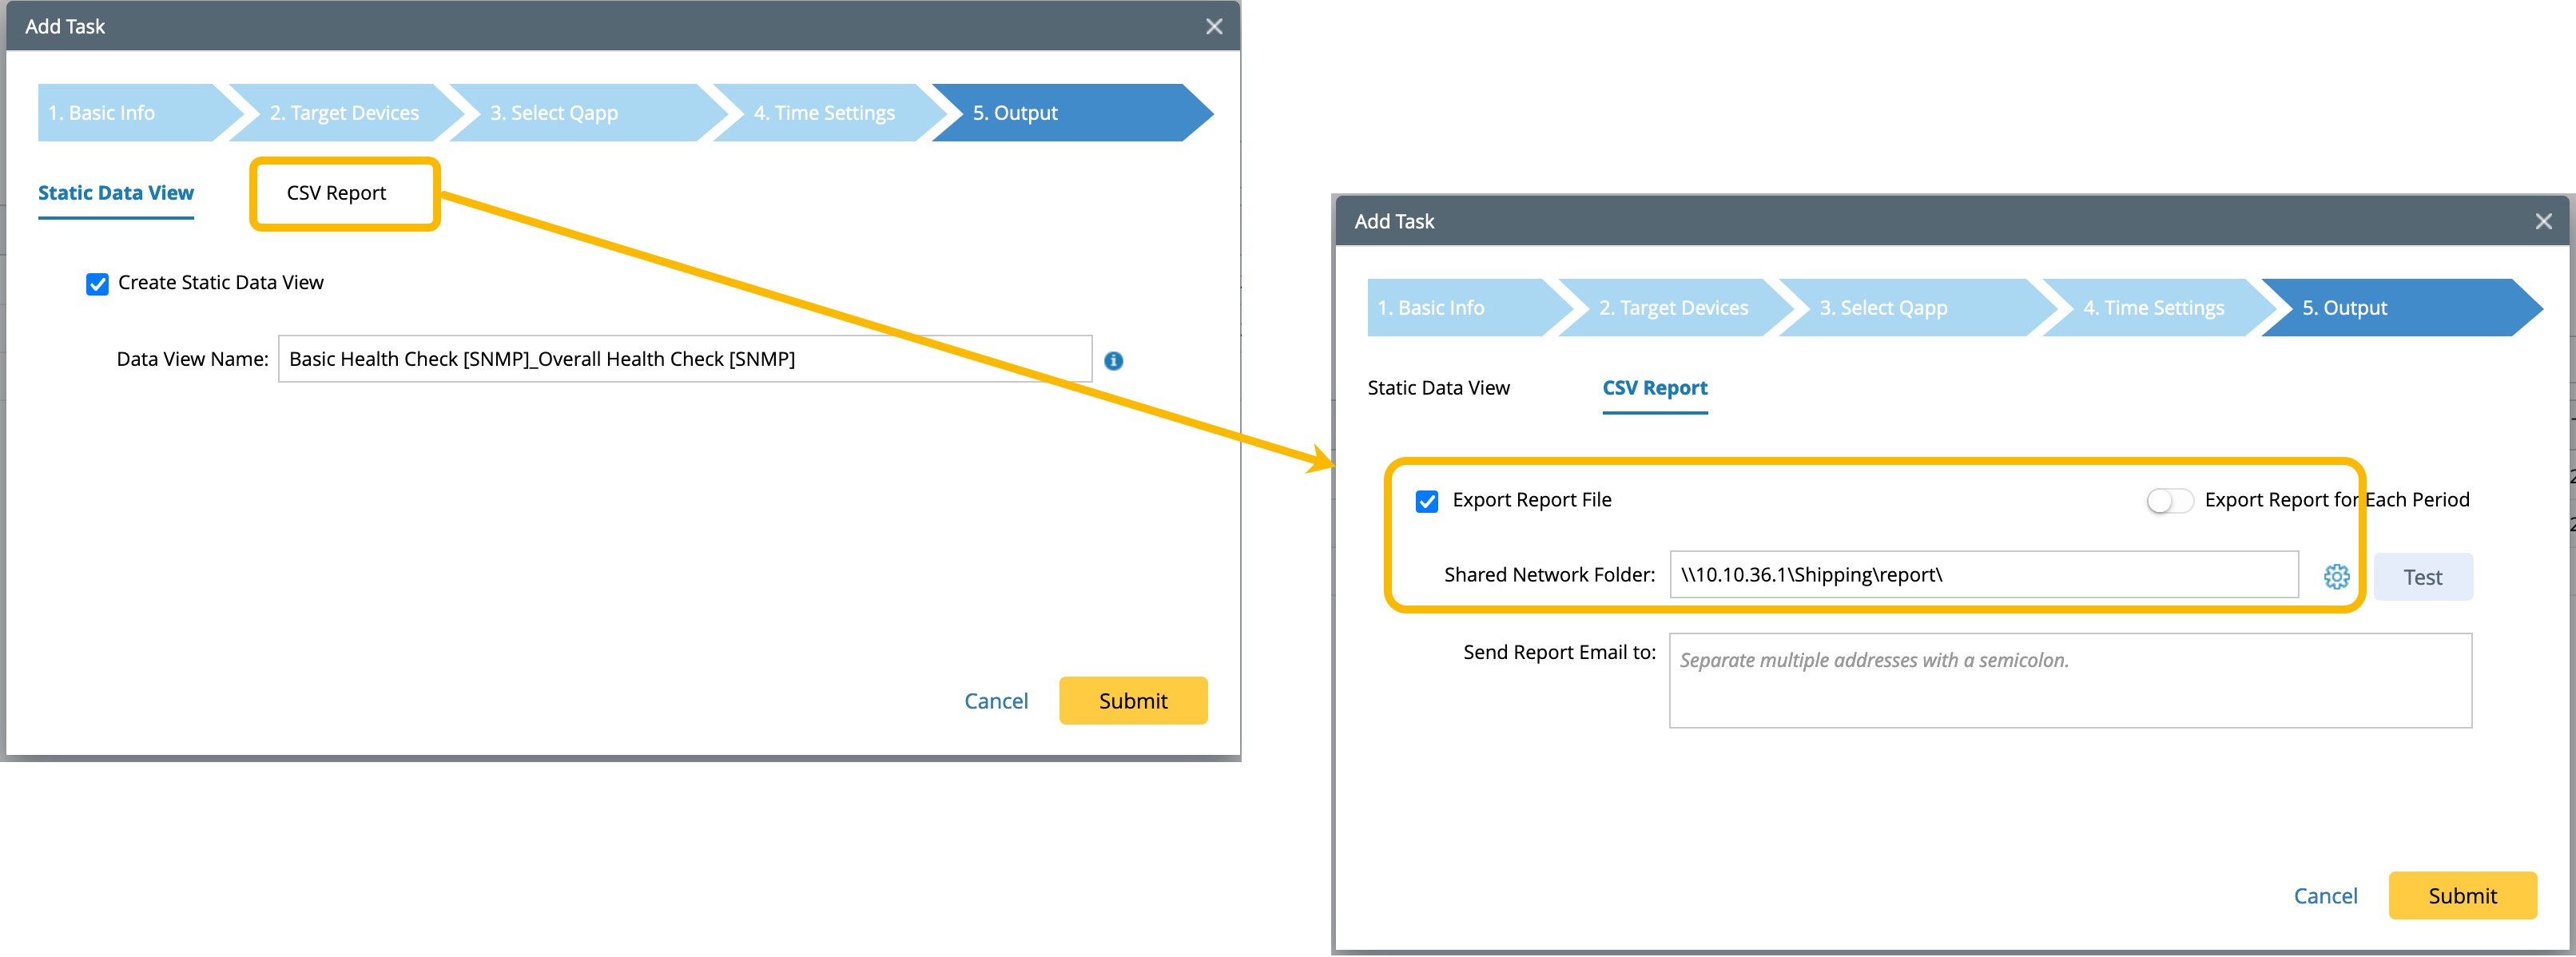
On the Output tab, click Submit. If the selected Qapp support CSV report generation, you can export the report file to a Shared Network Folder as shown in the following image.
Note: For Qapps that can generate alerts, configuring Email Server Settings are required before alerting emails can be sent. -
See also: