R12.3-2026Apr21
Set up Triggered Diagnosis by Email
Follow the steps below to set up Triggered Diagnosis by Email:
-
Define the Incoming Email Server Settings.
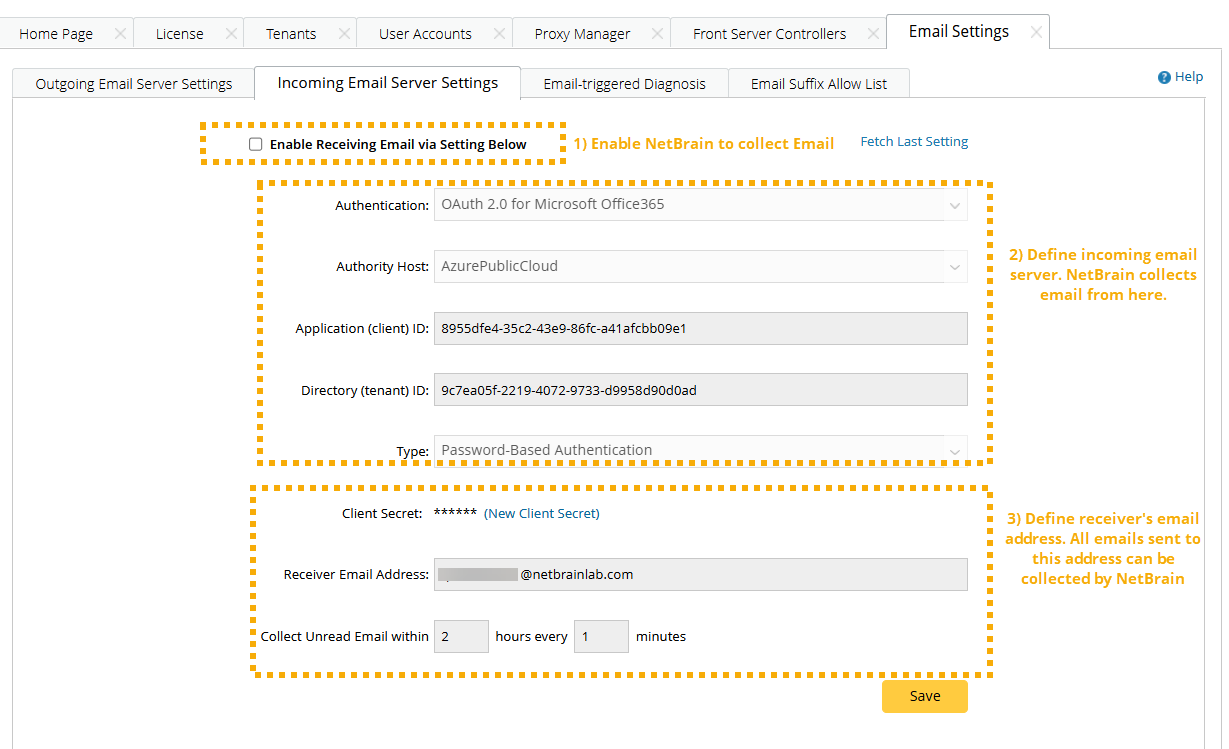
In the Email Settings > Incoming Email Server Settings tab in System Management, you can set up the receiver's Email address for the NetBrain System:
- Enable or disable the NetBrain System to receive Emails.
-
Define the authentication method:
- Select Basic Authentication> Define the IMAP Server for the NetBrain Receiver Email address, including the port and type of encryption.
- Select OAuth 2.0 for Microsoft Office 365, then follow the steps in Oauth2.0 Configuration Guide.
-
Define the Receiver's Email address, the password, and the frequency of collecting Emails.
-
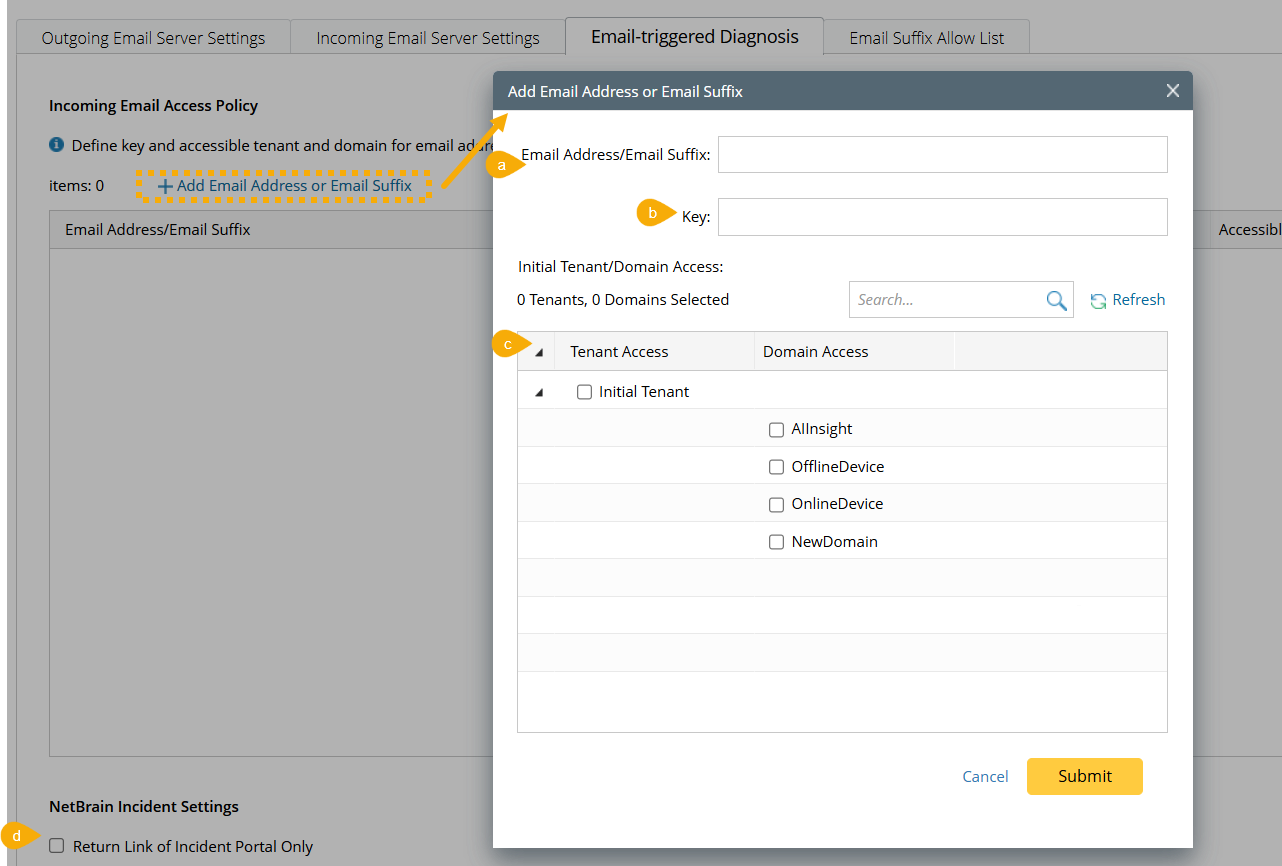
Configure who can run Triggered Diagnosis via Email.
In the Email-triggered Diagnosis tab, you can add an Email Address or Email Suffix to define the allowed Email address for NetBrain. Three components need to be defined for each Email address:
- The Email address or Email suffix.
- Key for this Email. Each Email address or Email suffix will have a unique key used for authentication. In the Email subject, the key for the sender's Email address or Email suffix must be filled in correctly to pass the security check.
- Accessible Tenant and Domain. Each Email address can only trigger the Diagnosis in the Tenants and Domains specified by the Accessible Tenant and Domain.
- The Return Link of Incident Portal Only option. When this option is enabled, only the link of NetBrain incident portal can be displayed in the reply.
-
Define Outgoing Email Server Settings
In the Outgoing Email Server Settings tab, you can define the outgoing Email server settings such as Email address, password, and SMTP port.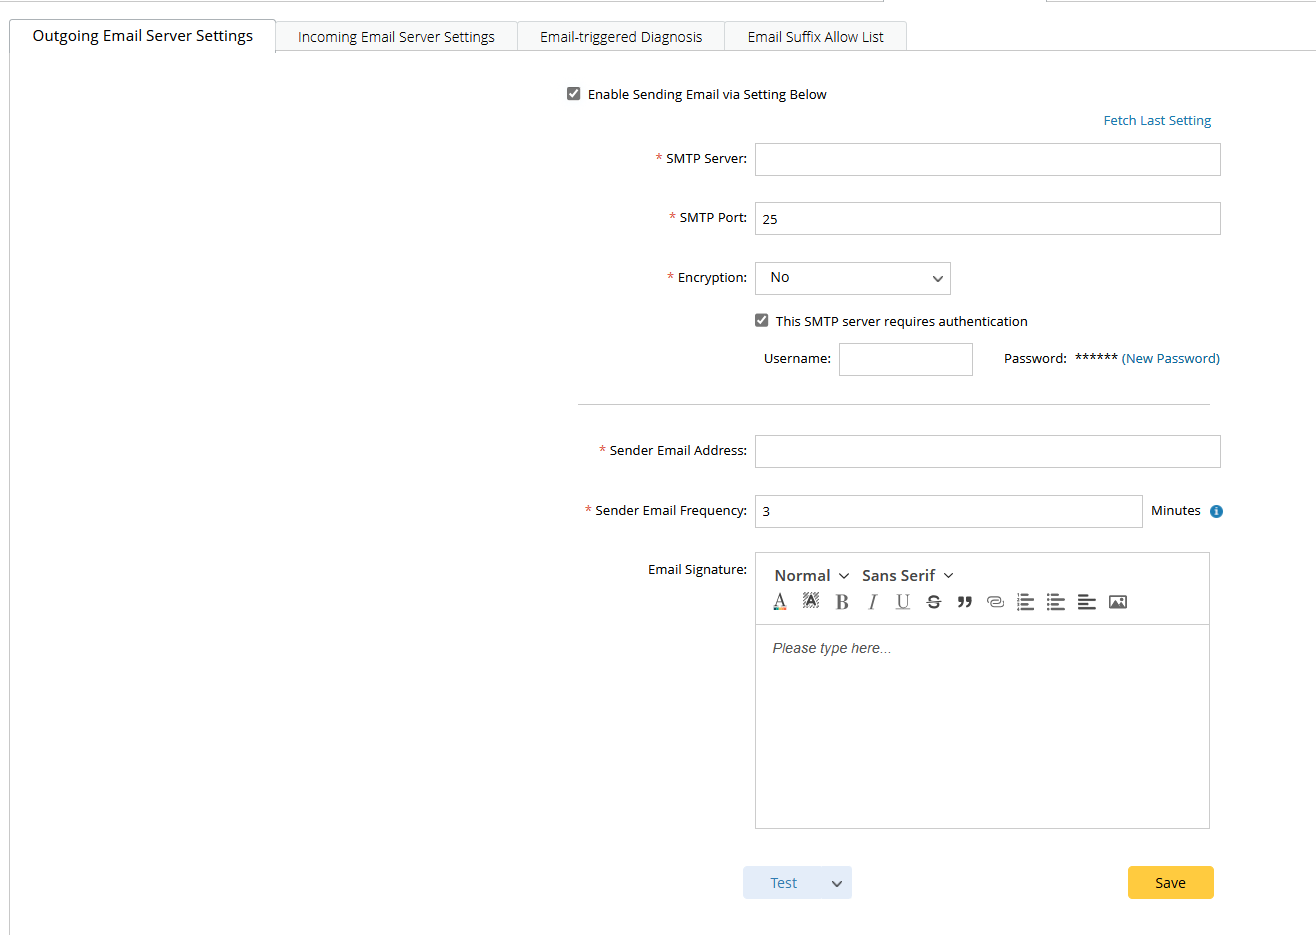
-
Enable email trigger for the incident type and data field.
- Click the start menu and select Triggered Automation Manager.
- Navigate to the Manual-setup Triggered Diagnosis > Incoming Incident Type tab or the Virtual Incident Type tab, and select the desired incident type.
- Click
 and select Define Interactive Trigger.
 - Enable the Email Trigger for the incident type and the data field.
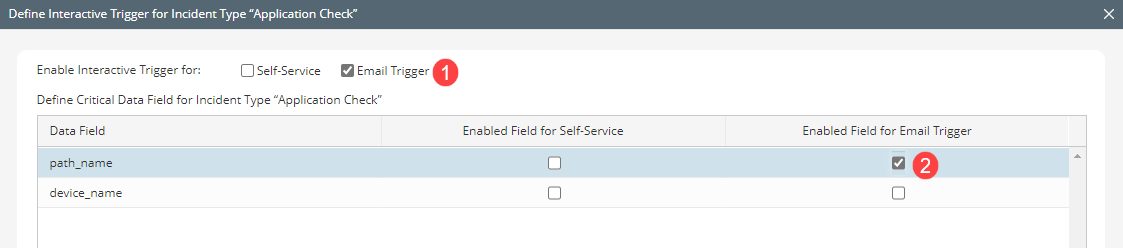

Note: If the data field was defined as a mandatory data field in the incident type, the checkbox here will be checked and cannot be unchecked.
- Define the email template.
- Click the Email Trigger tab, and you can preview the email template on the left pane.

- Click the subject and define the key description and subject content. Then click Apply.
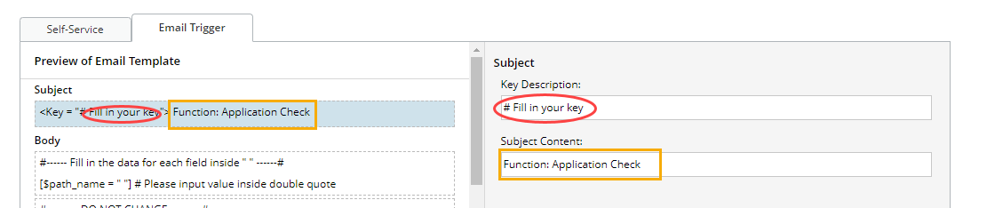
- Click each block of the email body and define the descriptions. Click Apply when one block is finished.

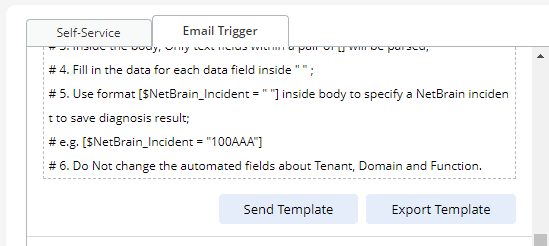
- Click the Email Trigger tab, and you can preview the email template on the left pane.
- You can export the Email template or send it to end-users.
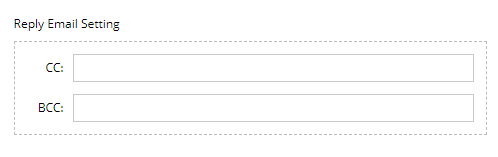
- Define the Reply Email Setting. When the triggered diagnosis is complete, the system will send the diagnosis to these emails.
- Click Save.