10.1.9 JA Publication
Define Execution Settings
In the Configure Triggered Automation for ADT window, you can define the logic to check the interface state by executing the Intent(s) and create a map for the Intent. You can specify which to execute.
- Select the Execution mode: Execute Intent, Deliver Intent Map, and Deliver Automation Map. The execution setting supports multiple selections, and users can select one more of the following three options:

- Execute Intent: Execute the ADT intent when the automation is triggered.
- Deliver Intent Map: Deliver the intent map. If an ADT has an Intent Map, the system will display the map in Incident Portal. An incident message will also be created with a hyperlink of the Intent Map.

Note: If an NI has an Intent Map, the system will display the map in Incident Portal. Otherwise, the system will create an Intent Map according to the logic defined in ADT and the resources in ADT. An incident message will also be created with a hyperlink of the Intent Map. - Deliver Automation Maps: Deliver some or all the maps in the ADT or create a map with ADT assets to Incident Pane. You can click All Maps to select maps in the ADT to deliver.
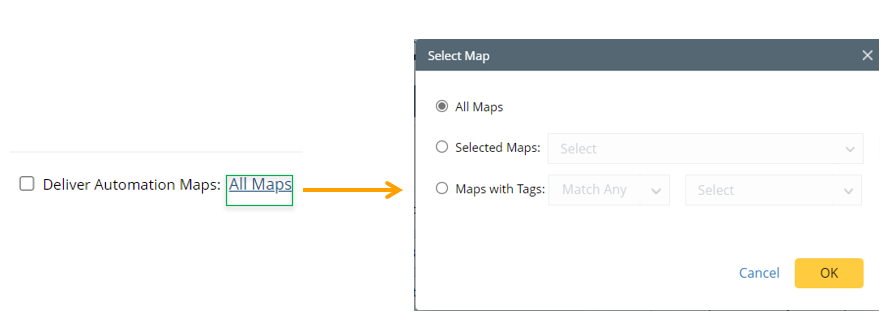
- All Maps: Select all maps in the ADT.
- Selected Maps: Manually select several maps in the ADT.
- Maps with Tags: Select tags, then filter maps having matched tags to deliver.
- Define the ADT Intent Execution Setting: Click Advanced Settings to define how the results are displayed in the Incident Portal.

- Set Incident Device after Execution:
- Include All Intent Devices: Set the incident device(s) to include all intent devices.
- Include Intent Device with Alert Status Code: Set the incident device(s) to include only the intent device with the alert status codes.
- Create Incident Message by Status Code: This will create an Incident message with the status code.
- Customized Incident Message for Map. For example, View devices.
You can also insert the data field or custom variable defined in the incident type.
- Click +Add.
- Select Insert Data Field> Select the desired data field> Click OK.
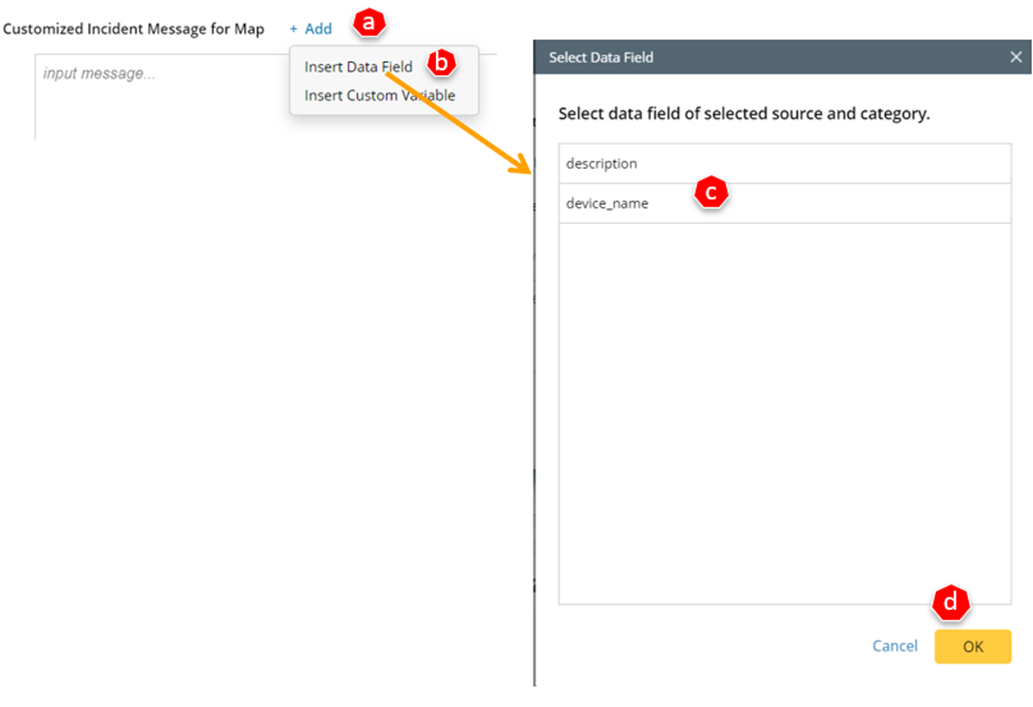
- Select Insert Custom Variable> Select the desired custom variable> Click OK.
- Select Insert Data Field> Select the desired data field> Click OK.
- Click OK to save the settings.