Export a Map to a Word Document
You can export a map to a Word document and save it in the File folder within the system or download it for offline use. During export, you can customize the content template to control which map, device, and intent data are included. The system also supports generating AI-assisted documents that automatically organize insights, configurations, and findings into a structured Word format.
Compared to other export formats, Word export provides greater flexibility and content control, allowing you to include topology maps, multiple map views, device configurations, data tables, and analysis results. The generated document is well-organized and formatted for easy review, sharing, and documentation purposes.
Follow the steps below to export a map to Word format: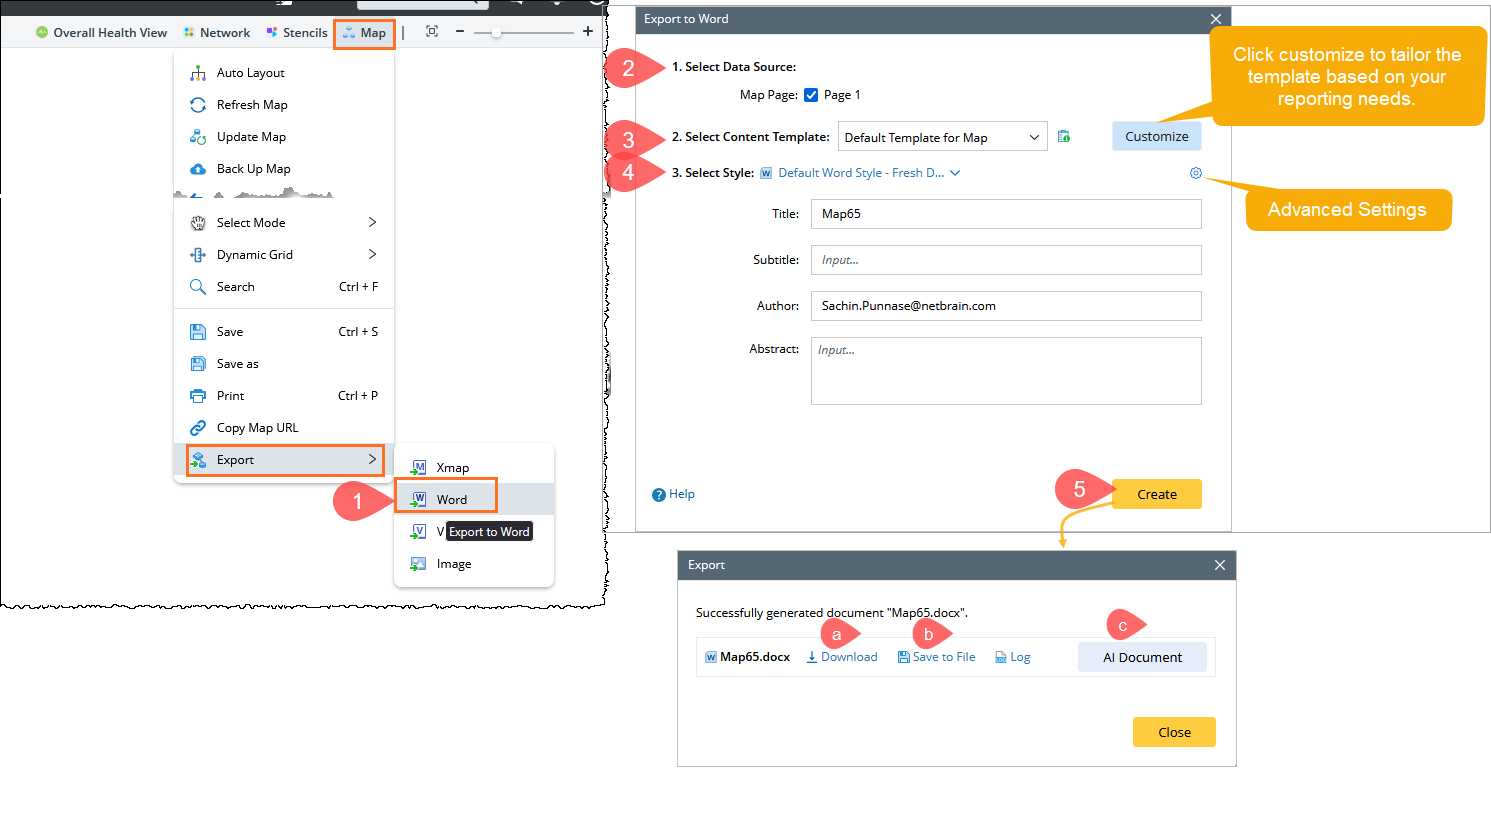
- From the top menu bar, click Map, then select Export > Word. This opens the Export to Word dialog for the current map.
- In Select Data Source, choose the Map Page you want to export. By default, the currently active map page is selected.
- In Select Content Template, choose Default Template for Map or click Customize to tailor the template based on your reporting needs.
For more information about customizing a template, refer Content Template manager. - In Select Style, select a Word style (for example, Default Word Style – Fresh Dynamic Style) to control the document’s visual formatting.

Tip: You can click the Advanced Settings icon to configure the company name and logo. Enter the document metadata:
-
Title – Name of the map document
-
Subtitle (optional)
-
Author – Auto-filled with the logged-in user
-
Abstract (optional) – Brief description of the map content
-
- Click Create to generate the Word document. After the document is successfully created, choose one of the following options:
- Download – Download the Word document locally
- Save to File – Save the document to a specified folder
- AI Document – Further refine and enhance the document using AI features (For more information, refer AI Document.)
Word Style Manager
These steps are optional. You can modify the template using the Word Style Manager based on your needs.
Customize Template using Word Style Manager
Follow the steps below to customize a new template using the Word Style Manager.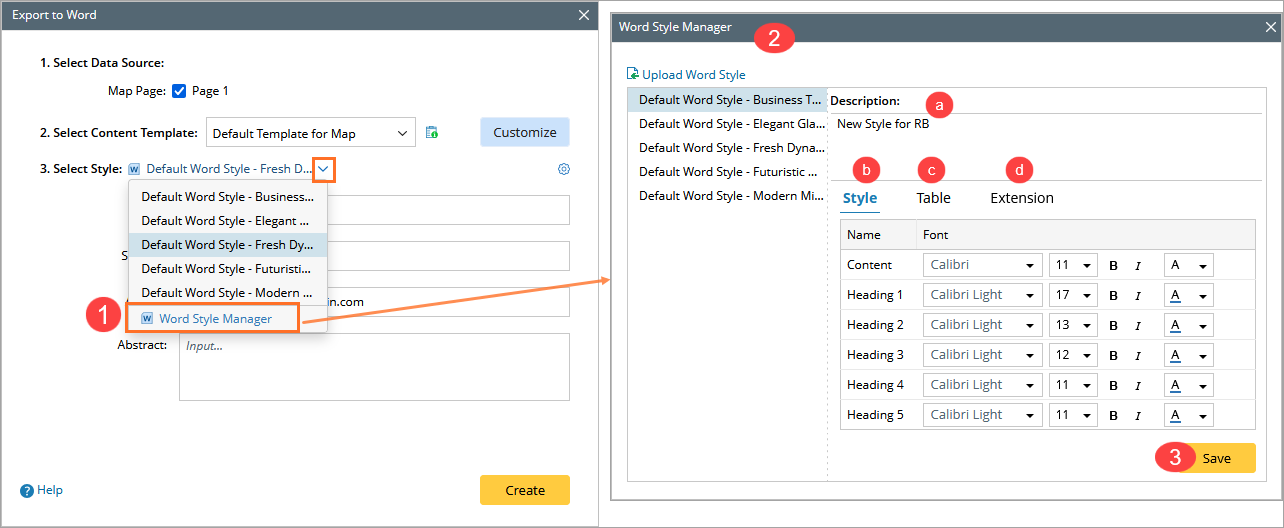
- In the Word Template field, click
 , and then click the Word Style Manager from the dropdown.
 - In the Word Style Manager dialog, define the following for the selected template:
- Description: Add a description for your template.
- Style: Define the style of content and different levels of headers.

- Table: Define the style of the table header and table row of the table in the exported Word doc.

Note: Check the Repeat header rows on each page checkbox; the header will appear on each page if the table is separated by multiple pages. - Extension: If the Display creation information on cover page checkbox is enabled, the creation time of the Word doc will be added to the exported Word file.

- Click Save to complete the settings.
Edit Word Template via Download/Upload
You can now manage and download multiple customized Word style templates instead of using only the default template. This provides a flexible way to modify a Word template using the following process: Download → Modify Externally → Upload.
Follow the steps to complete this process:
- In the Word Template field, click , and then click the Word Style Manager from the dropdown.
In the Word Style Manager, hover over the desired default word style, click
and select Download.
Modify the downloaded Word Template, e.g., changing the background pic on the cover page, changing the company name, and more.- To add the modified template, click Upload Word Style. You can also customize styles in the Table and Extension tabs.

See also: