You can define an intent for a path, called the Path Intent. You can use Path Intent to document the baseline data and define the diagnosis logic for a path to achieve more efficient troubleshooting. Once network issues occur, the predefined path intent can be triggered to execute as a member NI of a NIC by the TAF (Trigger Automation Framework) or executed manually to diagnose the network problem. The path and its built-in path intent are in a self-contained relationship. Path intent has the same name as the associated path and is directly stored in the path object.
The system provides several methods to create a Path Intent.
- Create a Path Intent Via Auto Intent
- Create a Path Intent Manually
- Create a Path Intent by Cloning from NIC/NIT Template
- Copy an Existing Intent
Create a Path Intent Via Auto Intent
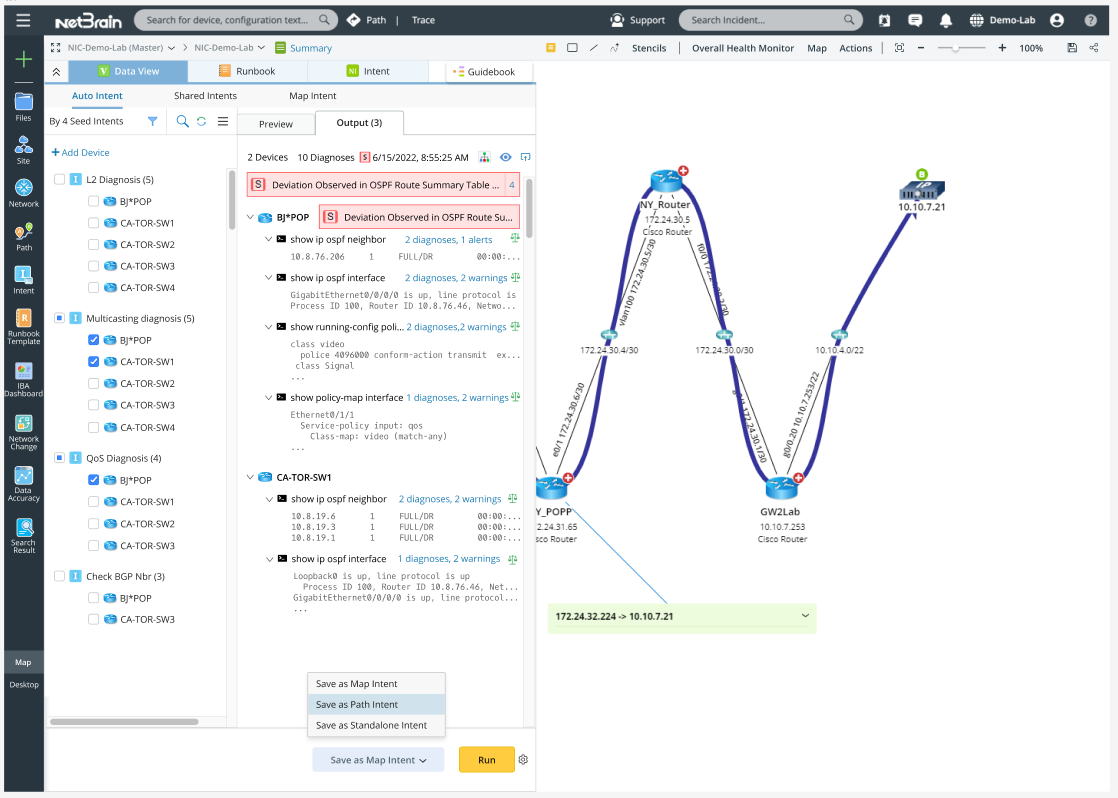
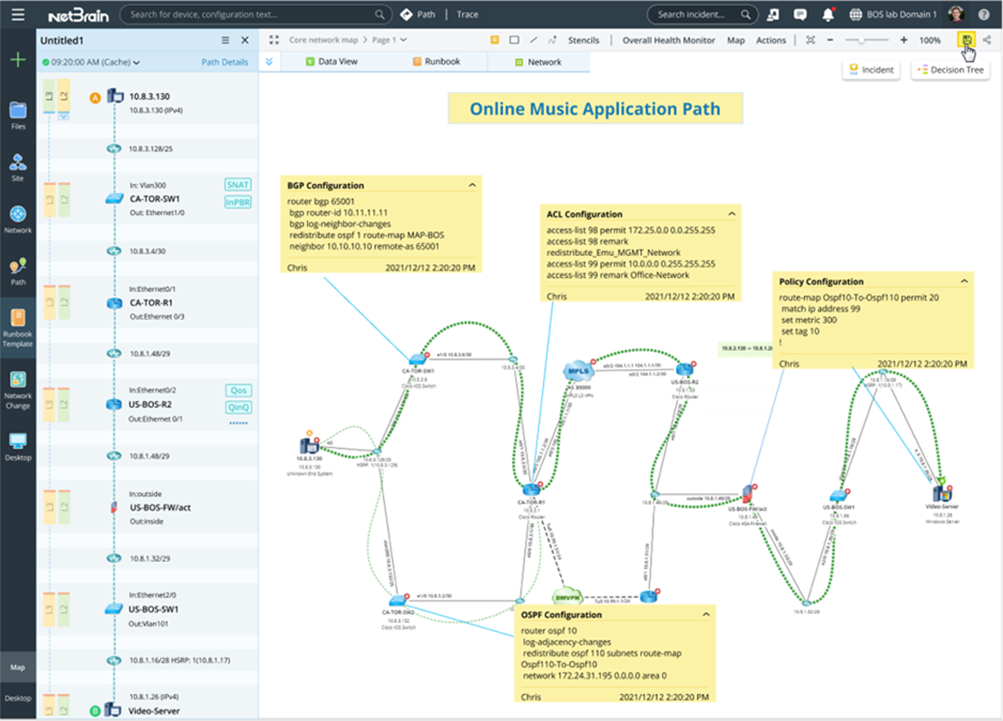
When you map a path, the system lists all decoded intents applicable to the devices along the path under the Auto Intent. You can create an intent from the Auto Intent and save it as the path intent. See Save the Created Intent for details.
- Draw a path map or open an existing path map.
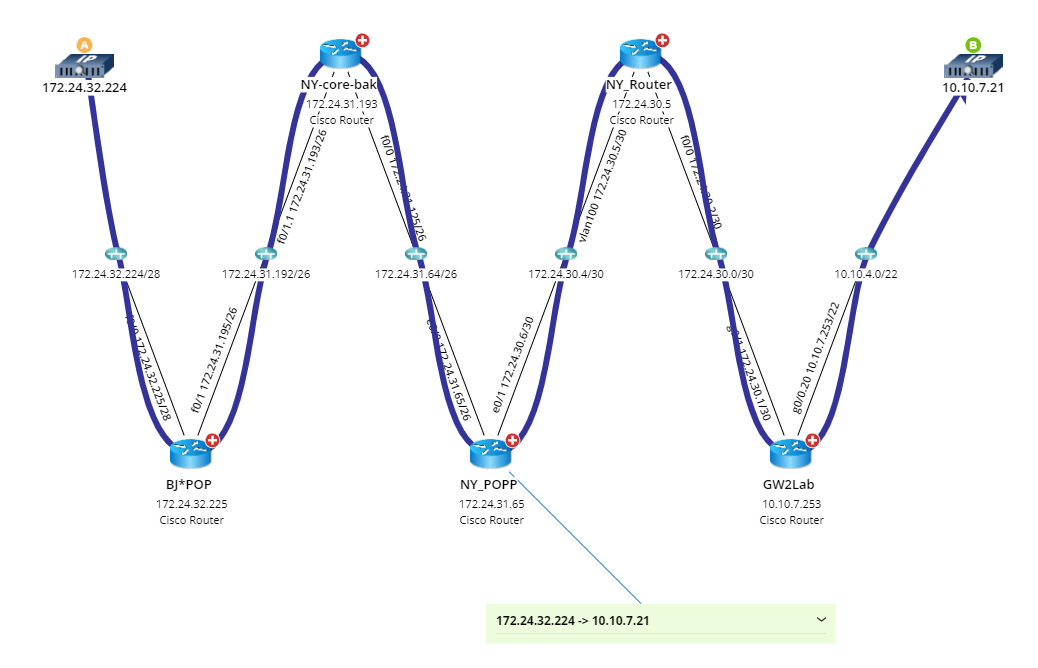
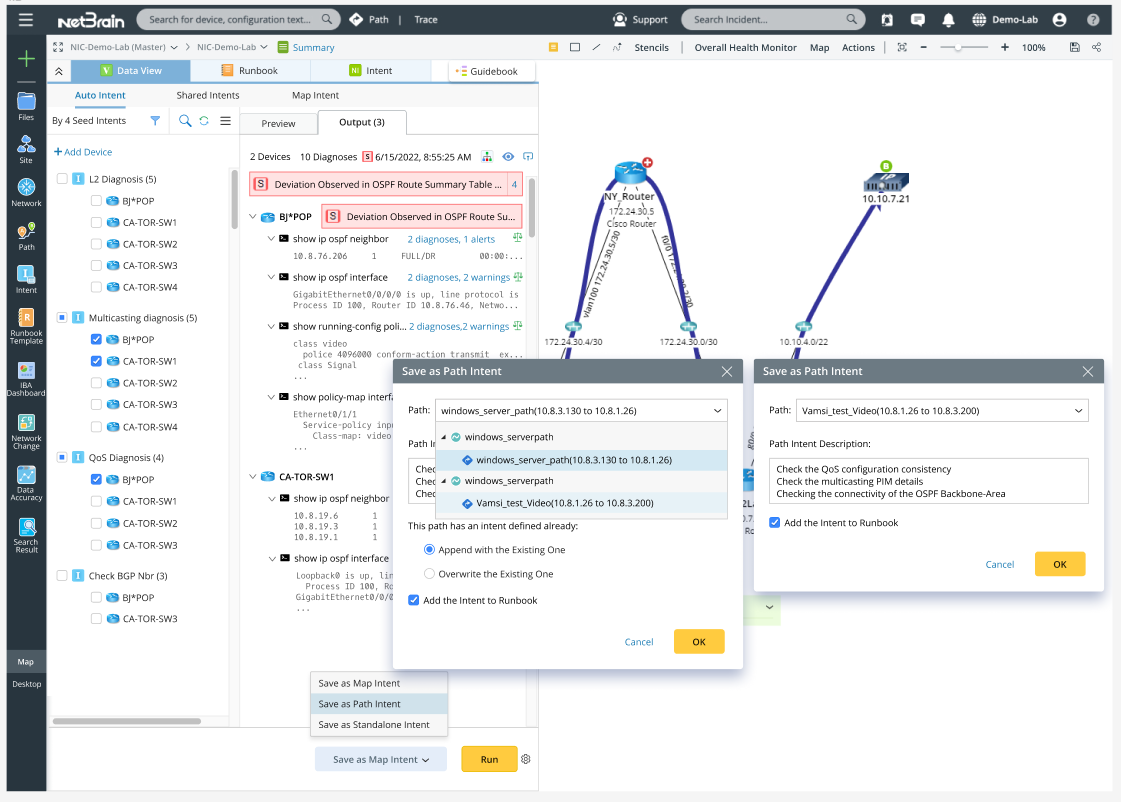
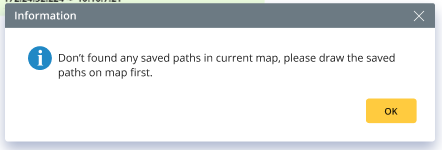
- Select Path: Select a saved path in the map. If there is no saved path in the current map, you can draw the path on the map.
- Define Path Intent Description: By default, the Description is a collection of descriptions of all the seed intents.
Create a Path Intent Manually
A new path intent can be directly created from the Path Intent pane.
- Click Path Details > Path Intent on an open path.
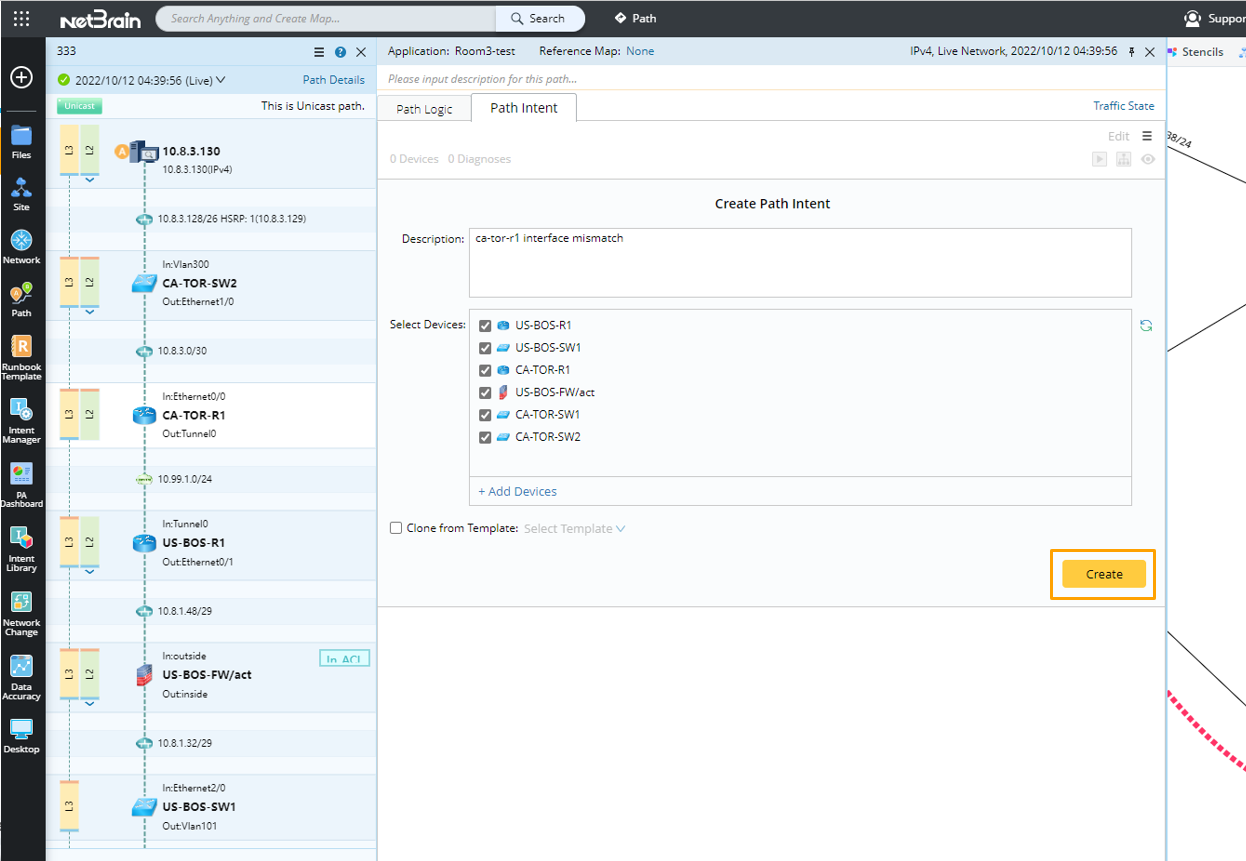

Tip: Path intent cannot be saved or copied if the path is not saved yet. A message will pop up to prompt you to save the path before creating or copying a path intent. 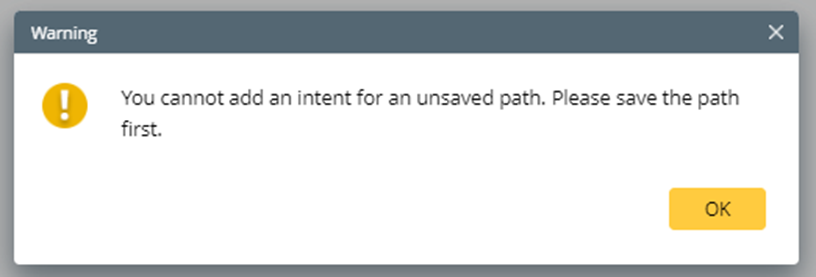
- Define the details of the path intent, then click Create.
- Description (optional): Enter the Description information in the Description field .
- Select devices: Select devices from the drop-down list of the Select Device field. All the path devices are loaded for selection.
Tip: You can lick the  icon at the right of the Select Device field to sync the new devices to the device list.
- Edit path intent: Click Edit to open the Network Intent (Edit Mode) dialog box. Edit the device Diagnosis logic for each of the selected devices. Refer Network Intent for details on how to create an intent.
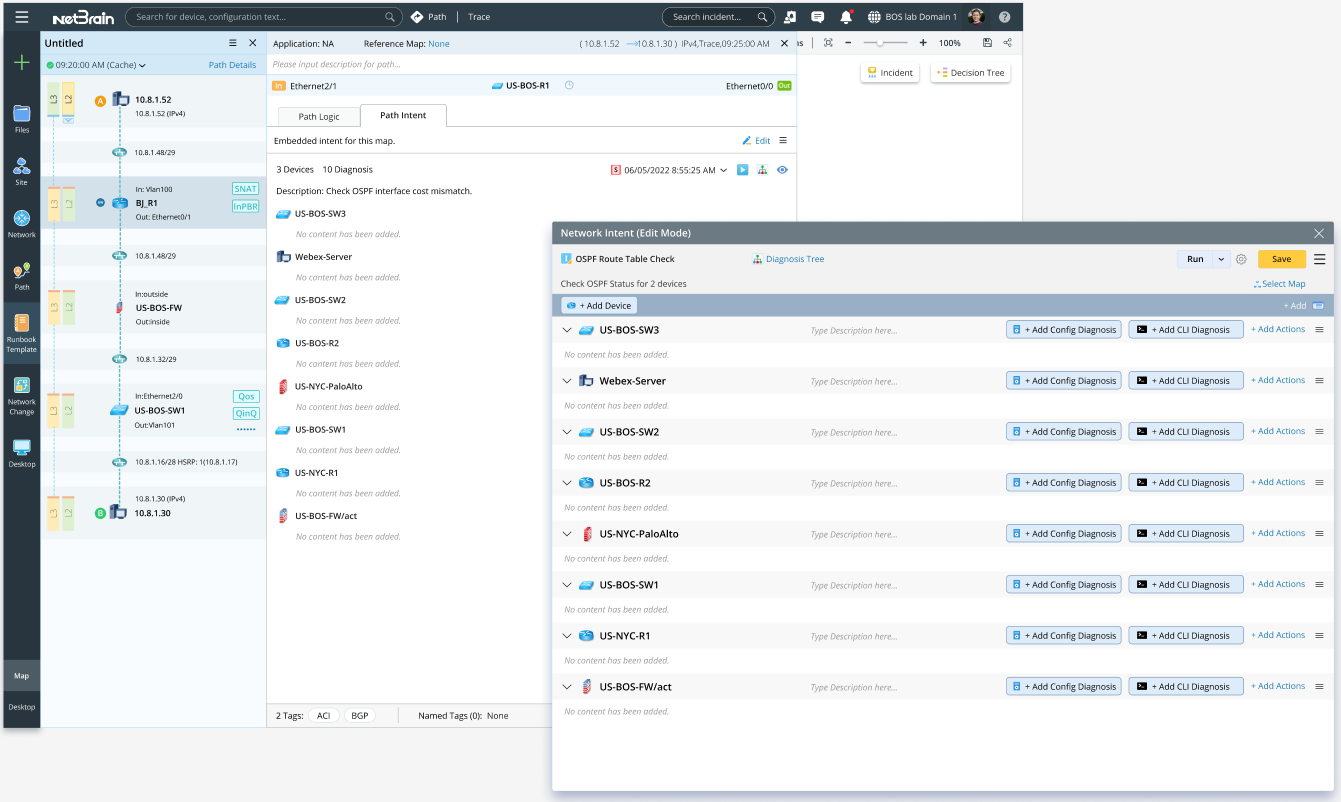
- Save the path intent. Click Save in the Network Intent (Edit Mode) dialog.
After saving, the Intent definitions are shown in Path Intent Pane.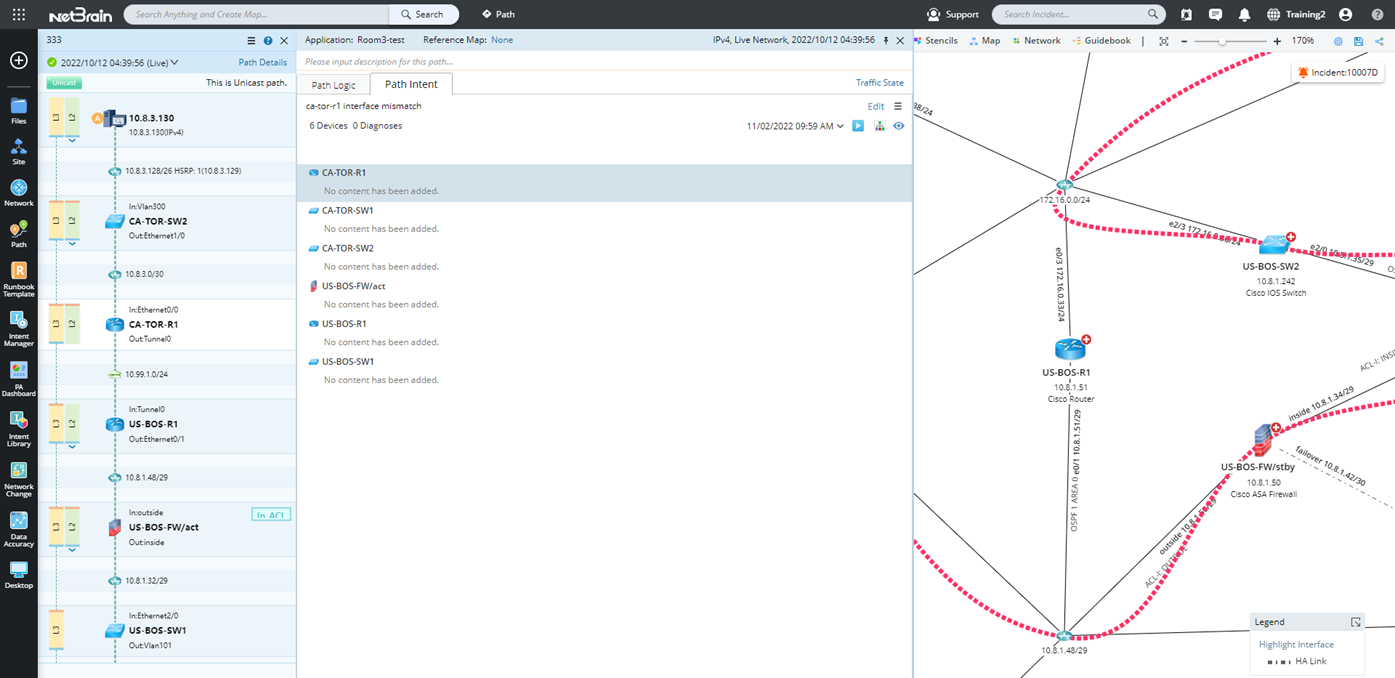
|
|
Note: If a path intent already exists, the new path intent will replace the previous one. |
Create a Path Intent by Cloning from NIC/NIT Template
Path intent can be created as a member NI of an NIC or cloned from an NIT.
- Click Path Details > Path Intent, then define the basic information of the new intent.
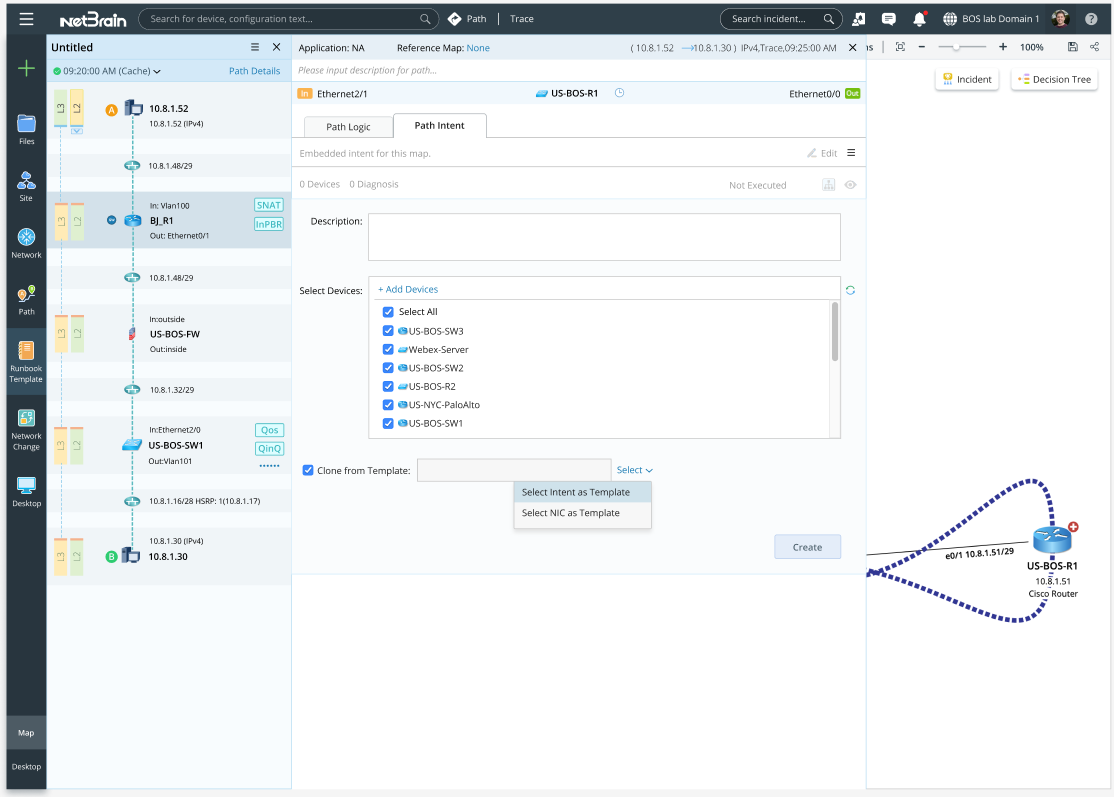
- Description: Enter the Description information in the Description field (optional).
- Select devices: Select devices from the drop-down list of the Select Device field. All the path devices are loaded for selection.
Note: If no Description is defined in the previous step, the Description of the path NI shares the same Description with the member NI of the NIC template.
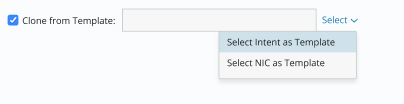
- Check the Clone from Template checkbox.
- Click Select to select an Intent or NIC as the template to clone from the drop-down menu.
- Select a template from the pop-up dialog box, then click OK.
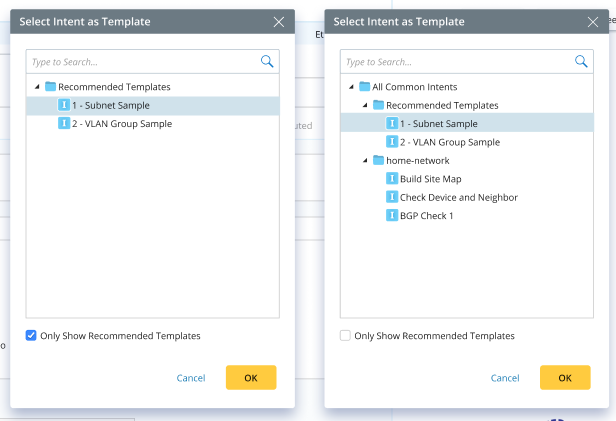
Clone by Intent Template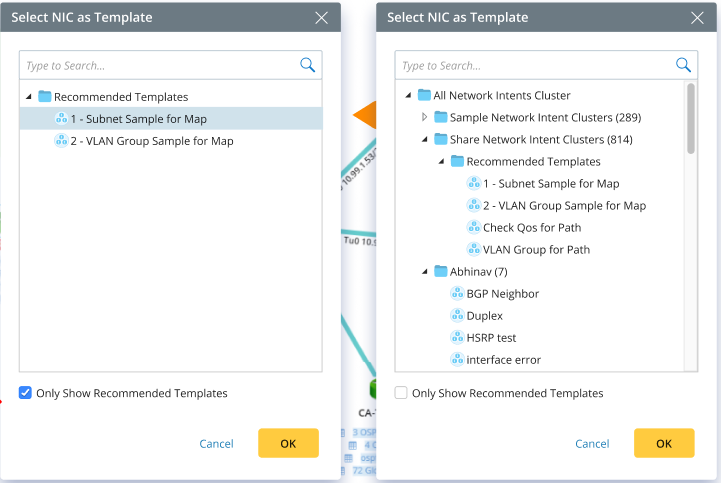
Clone by NIC Template
- By default, NIT is selected from the folder /All Common Intent/Recommended Template, and NIC is selected from the folder /Shared Network Intent Cluster/Recommended Templates.
Tip: Uncheck the Only show Recommended Templates box to display all the NIC/NIT templates in the NIC manager for selection.
- Click Create.
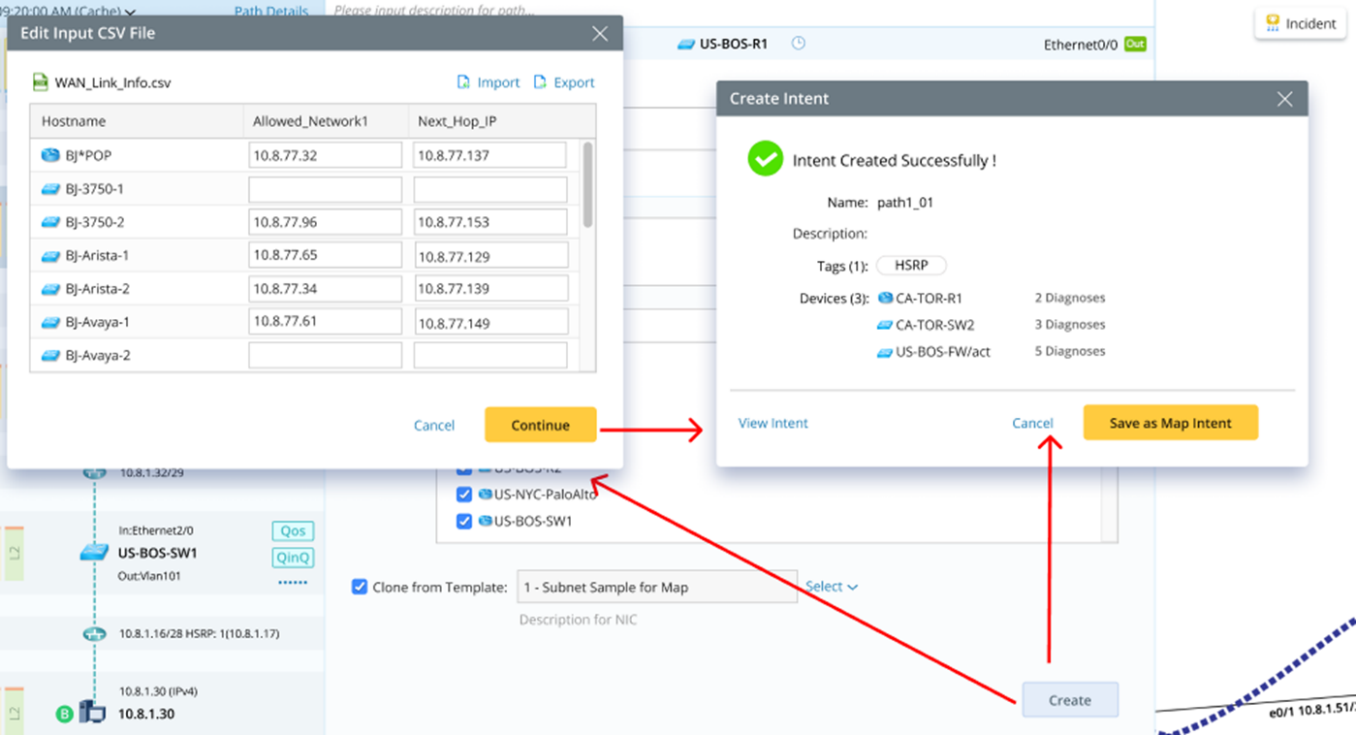
If the selected path NIC template requires CSV inputs, complete the CSV inputs in one of the following two ways:
- Edit the input CSV file in the pop-up window.
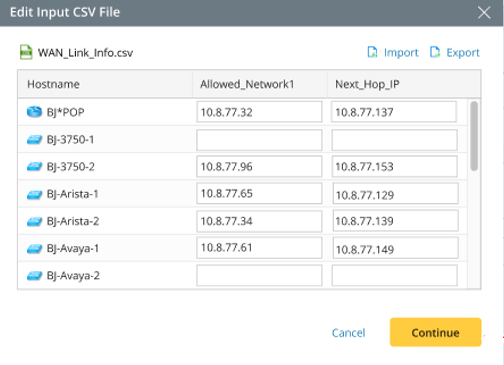
- Click Export in the pop-up window to export the CSV file and edit it in your local machine, then click Import in the pop-up window to the edited CSV file to the path NI.
Note: Hostname is predefined as the primary key for merging the columns in the CSV file. In addition, the columns in the imported CSV file should be the same as those in the CSV file in the path intent template.
- Click Continue to continue with the creating process.
If the selected path NIC template does not require CSV inputs, new path intent is created directly.
A message will appear to notify the successful creation of the path intent:
- Click View Intent to preview the intent in the view mode.
- Click Cancel to close this message window and finish creating the path intent.
Note: If a path intent already exists, the new path intent will replace the previous one. A prompt message will appear when you save the path intent. 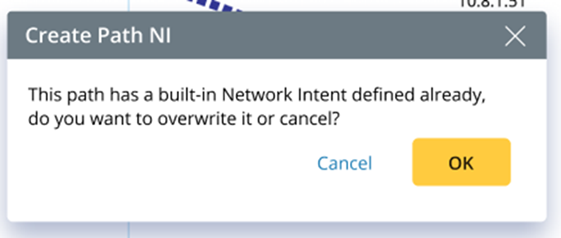
Copy an Existing Intent
You can directly select an existing intent as the current Path Intent. The existing intent can be copied and used if no path intent has been created. Otherwise, the copied intent will replace the existing one.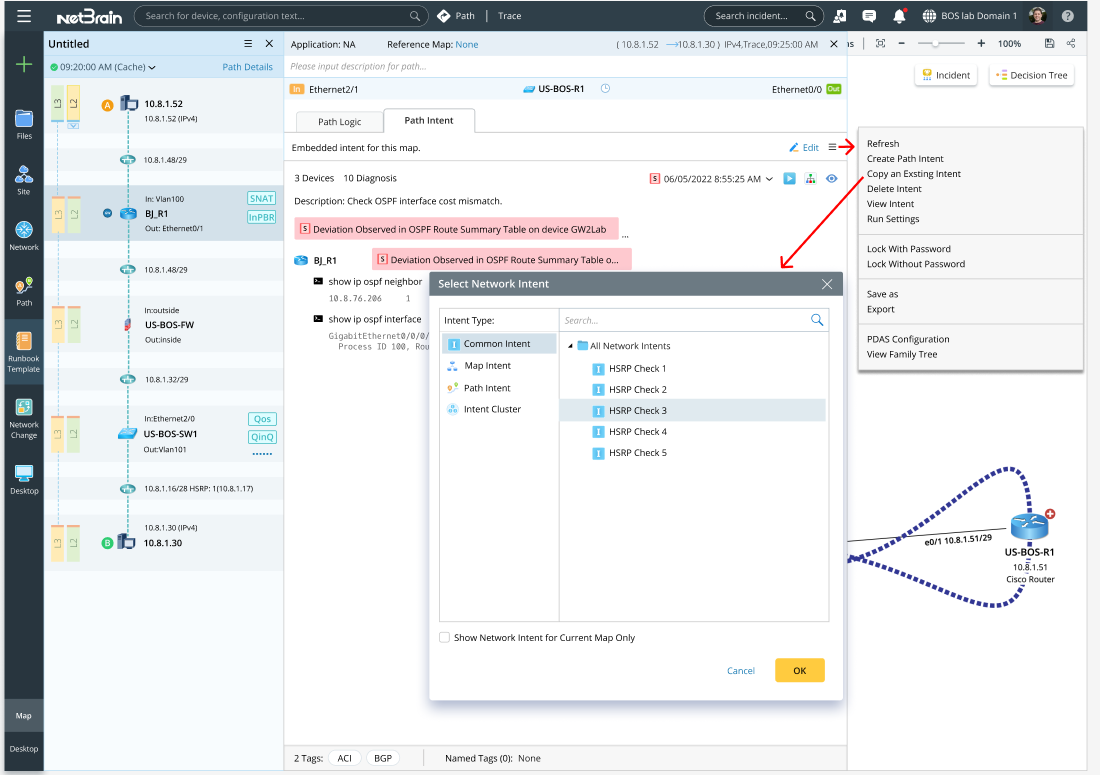
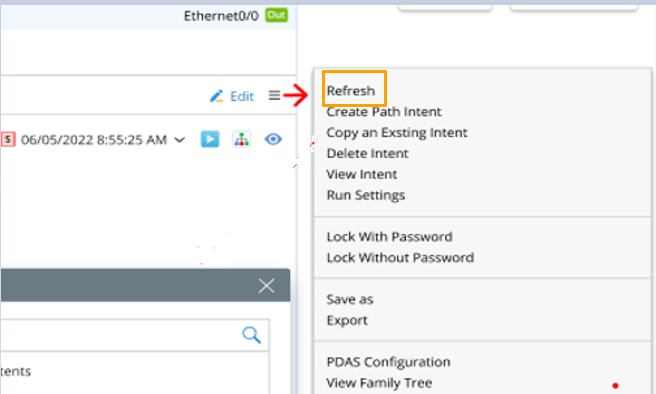
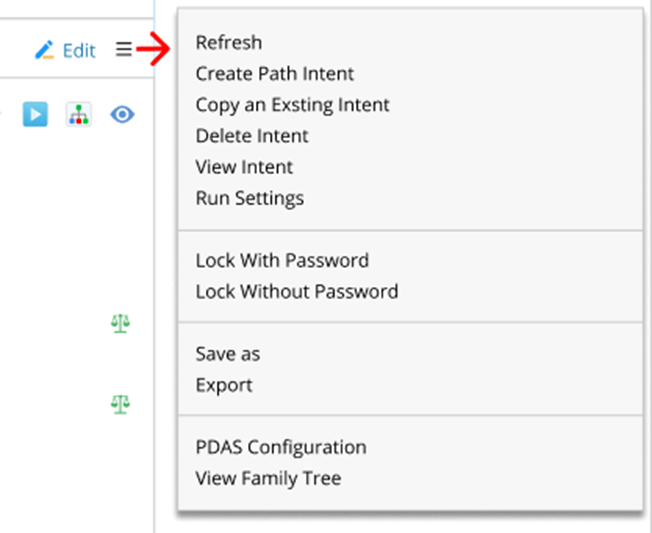
- Click the Hamburger menu, then click Copy an Existing Intent.
- In the pop-up dialog box, select an existing intent.
- Click OK to create the new path intent.
Note: If a path intent is created before, a prompt message will appear to ask you to confirm overwriting the old one.
After a Path NI is created, you can:
- Sync up path intent device when path devices change. Click Refresh from the Hamburger Menu.
- Click Edit to redefine the path intent.
- Click the
 icon to run/re-run the path intent.
 - Click the
 icon to view the Diagnosis Tree.
 - More common operations on the path intent are listed in the Sandwich Menu.
- Select Path Map as Intent Reference Map.
- Create and Save a Path Map.
- Click Select Map, then select a path map from the pop-up dialog box as Intent Reference Map.
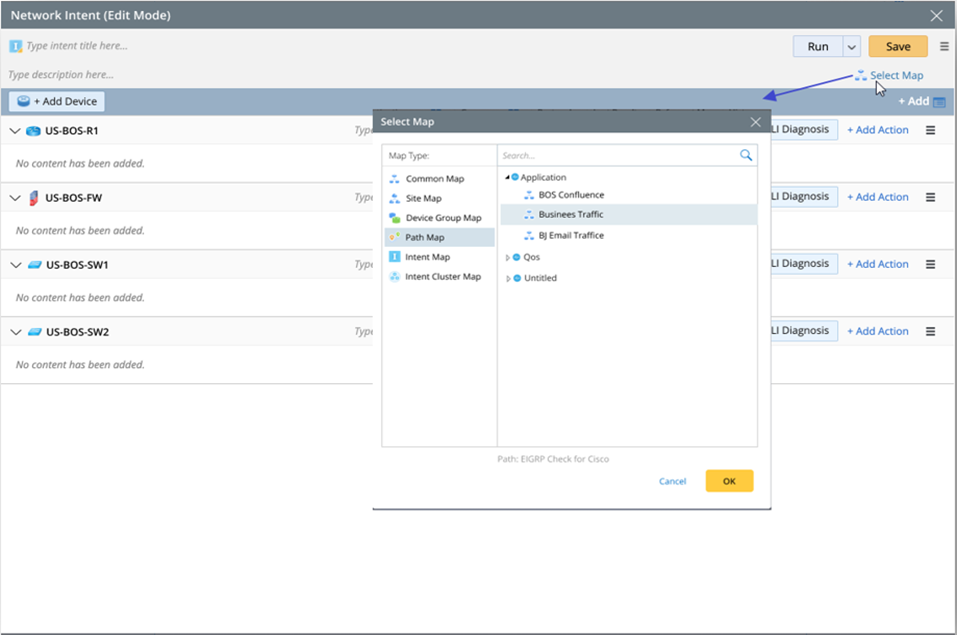
- Click OK.
- Create and Save a Path Map.