Manage Files
You can explore and organize various types of files in your domain, such as map files, dashboard files, and Windows files in the Files pane. By default, it contains the following categories of folders, displayed in the folder tree in the left pane.
- Desktop — contains files, folders and application shortcuts on your Desktop.
- Private — contains files and subfolders that are only accessible to yourself.
- Shared with me — contains the files shared by other users, including shared map and dashboard files.
- Public — contains files and subfolders accessible to all users in the current domain.
- Incident Files — contains files exchanged as attachments in Incident, such as an image file.
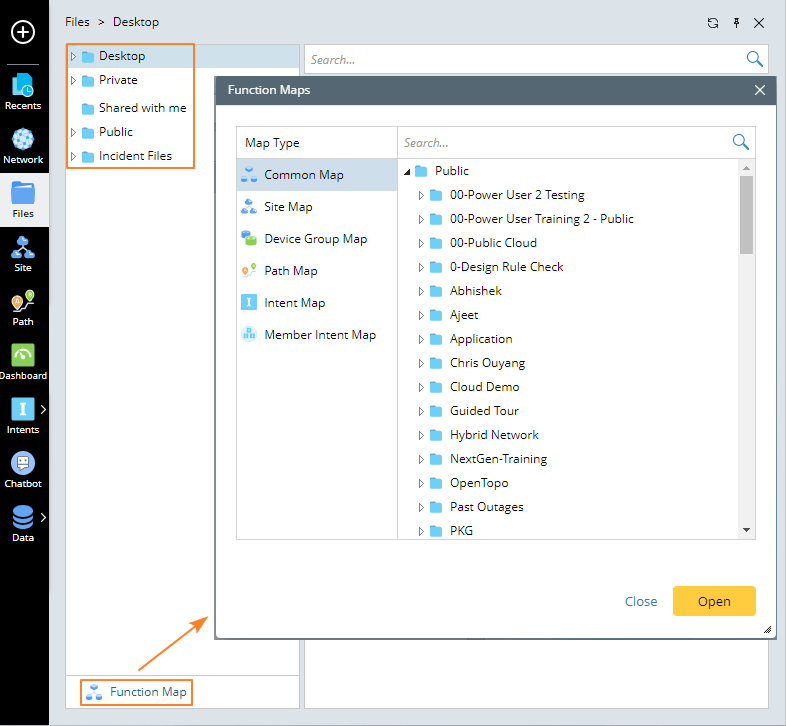
- Function Map — a central place to manage and display all types of maps, including Common Map, Site Map, Device Group Map, Path Map, Intent Map and Member Intent Map. It is located at the bottom of the Files pane.
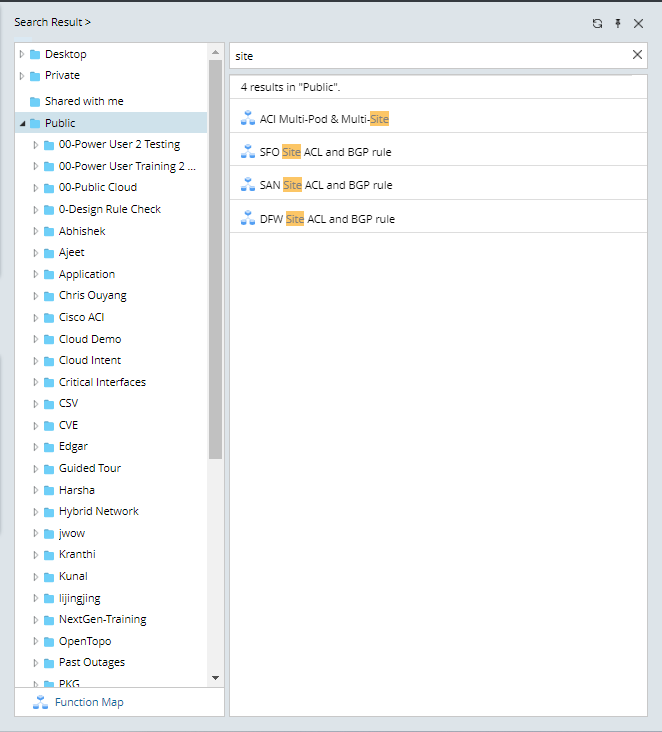
Search for Folders and Files
You can search for a folder or file in the Files pane by entering a search keyword in the search bar in the right pane. The system will filter out the matched items from the folder and files listed in the left pane.
Create a Folder
To create a sub-folder under the categorized folder:
- Click Files on the taskbar.
-
Point to the target folder category under which the new folder will be placed, and then click the
 icon. Select New Folder from the drop-down menu.
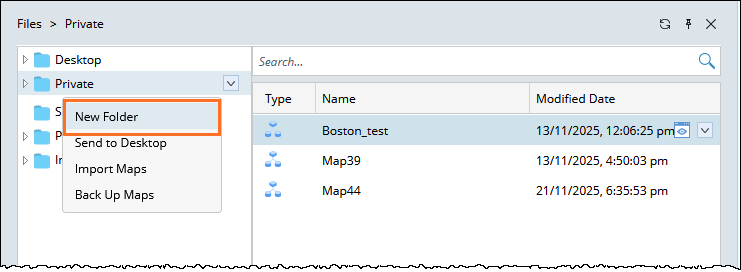
- Enter the folder name, and then press the Enter key on your keyboard.
Send Files to NetBrain Desktop
You can add a frequently used file to the Desktop for quick and easy access.
- Click Files on the taskbar.
- Locate the target file, right-click it and then select Send to Desktop from the drop-down menu.
The corresponding file shortcut will be automatically created on your desktop for quick access. You can also view the file shortcut in the Desktop category of the Files pane.
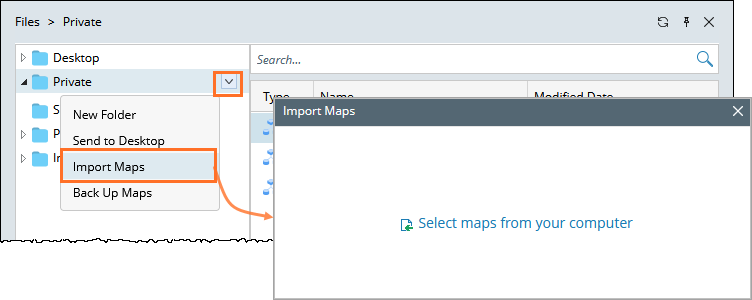
Import Maps
- Click Files on the taskbar.
- Go to action menu and select Import maps from the drop-down menu.
- In the pop-up dialog box, click Select maps from your computer to select a map from your local machine.
- Select the target files and click Import.
- Click Finish.
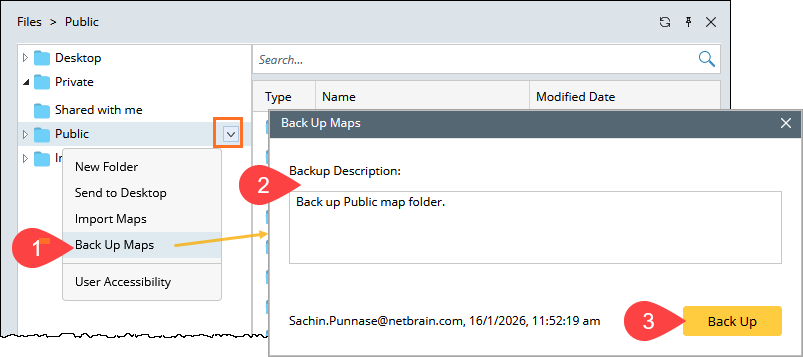
Back Up Maps
You can manually create a backup of maps stored in the Public folder. Each backup includes metadata such as the backup description, time, version, and user information.

|
Note: To use the Back Up and Restore options, users must meet all of the following requirements:
|
To back up maps:
-
Go to Files > Public, click the More options icon (▾), and select Back Up Maps.
-
In the Back Up Maps dialog, enter a backup description.
-
Click Back Up to create the map backup.
|
|
Note: You can also back up maps at the map level. To do this, go to Files, open the required folder, select a map, click the Actions menu, and choose Back Up Maps.
|
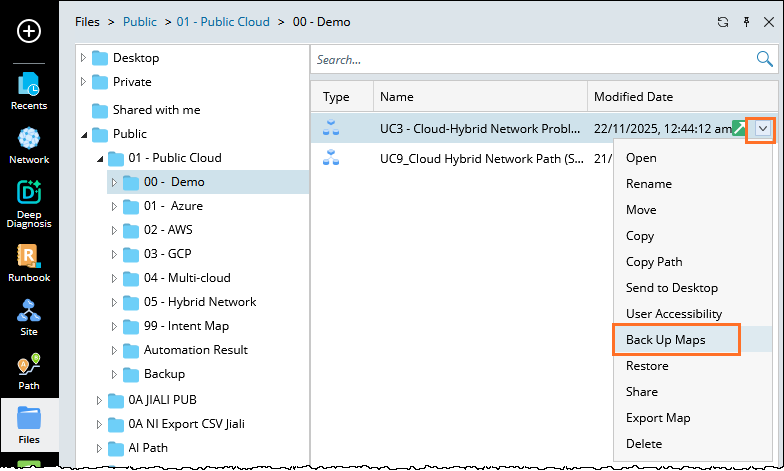
Functions at file level
You can perform the following actions from the individual map or dashboard file level.
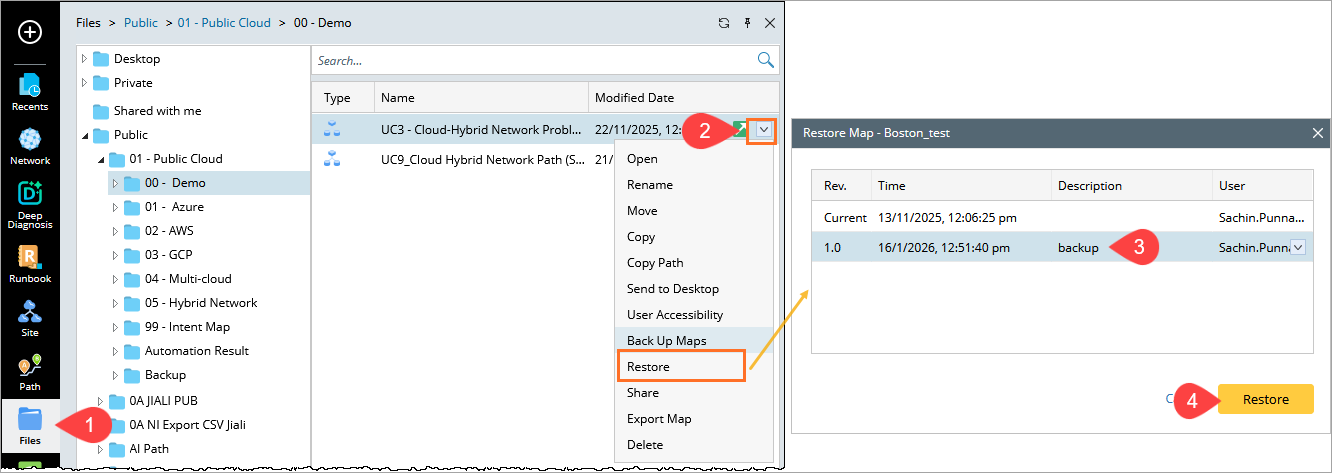
Restore
You can restore a map to any previously backed-up version using this option.
- Go to Files > Public, and navigate to the folder that contains the map you want to restore.
-
Click the Actions menu for the map and select Restore. The Restore Map dialog box opens and displays the available backup versions.
-
Select the required backup version from the list. The backup history shows the revision number, time, description, and user details.
-
Click Restore to restore the map to the selected version.
Share
You can share the Map or Dashboard to a user, to send the file link:
- Go to Files on the taskbar.
- Locate the target map or dashboard file, right-click to open the menu.
- S elect Share from the drop-down menu.
- In the Share Map window, enter email id or select a user from the drop down list.
- Type your message in brief explaining the file.
-
Click Share.
Tip: To share multiple maps or dashboard files in batches, you can select them by pressing the Ctrl or Shift key on your keyboard.
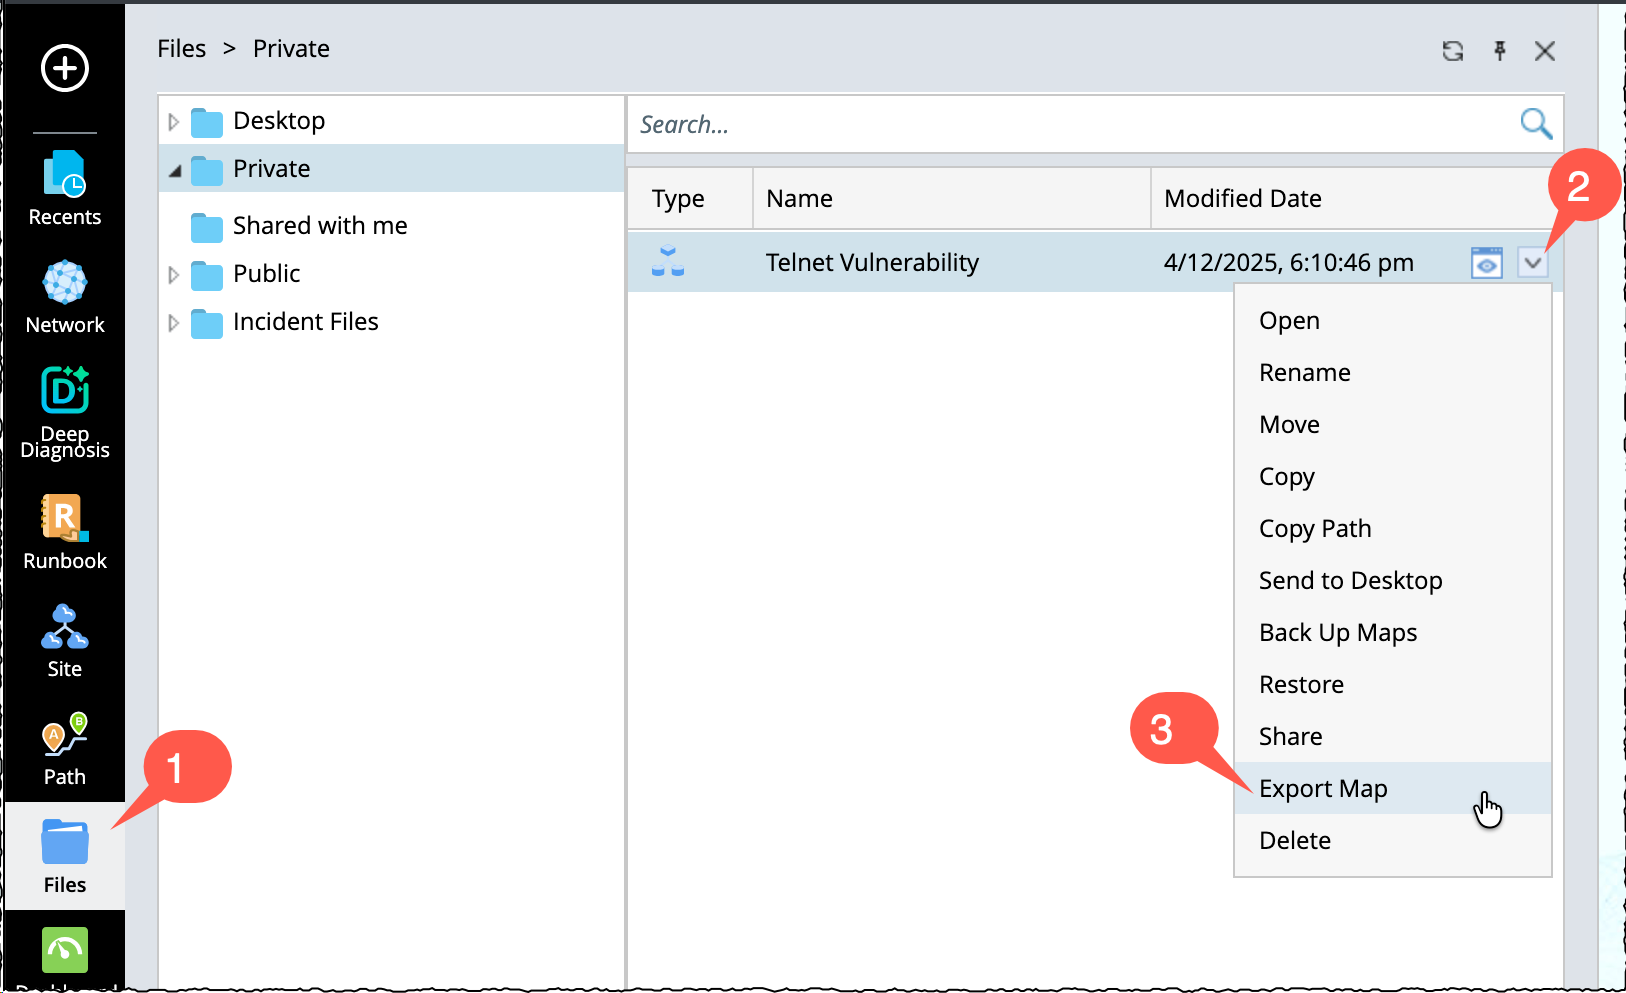
Export a Map
You can export a map to your local drive using Export Map option as follows:
- Click Files on the taskbar.
-
Go to a map file and click the icon.
- Select Export Map and file will be download to your local drive.
Tip: To export multiple map files in batches, you can select them by pressing the Ctrl or Shift key on your keyboard. The default location of the exported map file is C:\Users\<your username>\Downloads. You can also export from an opened map.
Manage Shared Files
The map or dashboard files shared with you are listed under the Shared with me category (except shared site overview map, site maps, and device group maps). Only the user with the editing rights of the map or dashboard can rename it. The delete operation will only delete the file under the Shared with me category.
To access the files:
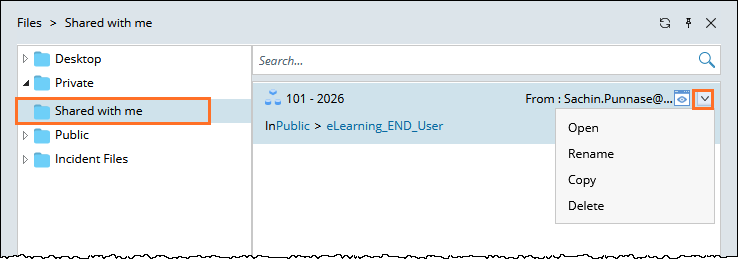
- Click Files on the taskbar.
- Select Shared with me in the left folder tree to open the list of shared files in this category.
- From the right-click menu, you can open, rename, move, copy or delete a shared file. You can add the file to the personal folder for your convenience.
Configure User Accessibility for the Public Folder
You can set the control over who can view or edit files and folders stored in the Public folder by using the User Accessibility settings. To configure User Accessibility:
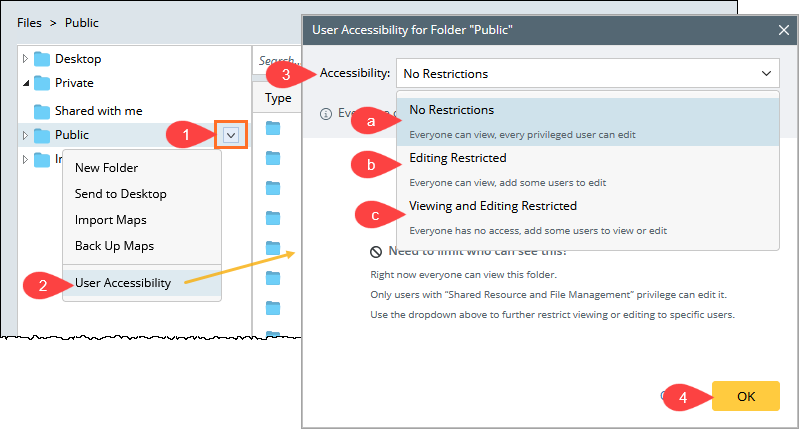
-
Go to Files > Public folder and then click the More options icon (▾) next to the Public folder.
-
Select User Accessibility,
-
In the User Accessibility for Folder "Public" dialog, select an accessibility option.
-
No Restrictions – All users can view the folder, and all privileged users can edit it.
-
Editing Restricted – All users can view the folder, but only selected users can edit it.
-
Viewing and Editing Restricted – By default, no users can access the folder. Only selected users can view or edit it.
(Optional) Add specific users to allow viewing or editing, based on the selected option.
-
-
Click OK to apply the changes.
Download a Visio Map
To view and download the Visio maps exported through benchmark tasks:
- Click Files on the taskbar.
-
Select the target folder under the Public category.
Note: The storage location of the Visio files depends on the benchmark task settings.
- Site maps — select the My Network folder generated under the specified folder.
- Shared device group maps — select the Device Group folder generated under the specified folder.
- Public maps — select the same location as the original maps.
-
Right-click the target Visio maps and select Download.
Note: The default location of the downloaded file is C:\Users\<your username>\Downloads.
Upload Window Files into NetBrain
- Click Files on the taskbar.
- Right-click a sub-folder to store the Windows file, and select Upload Window Files from the drop-down menu.
- In the pop-up dialog, click Select Windows Files from your computer.
- Select the target files and click Open.
- In the Import Windows Files dialog, click Start.
-
Click Finish.
Tip: To download windows files to your local disk, right-click the folder and select Download Windows Files from the drop-down menu, or right-click a Windows file and then select Download. The default location of the downloaded file is C:\Users\<your username>\Downloads.
Function Maps
Function Maps is where you can centrally explore and manage the map files across your domain. The maps are grouped into six categories in the standalone Function Maps window.
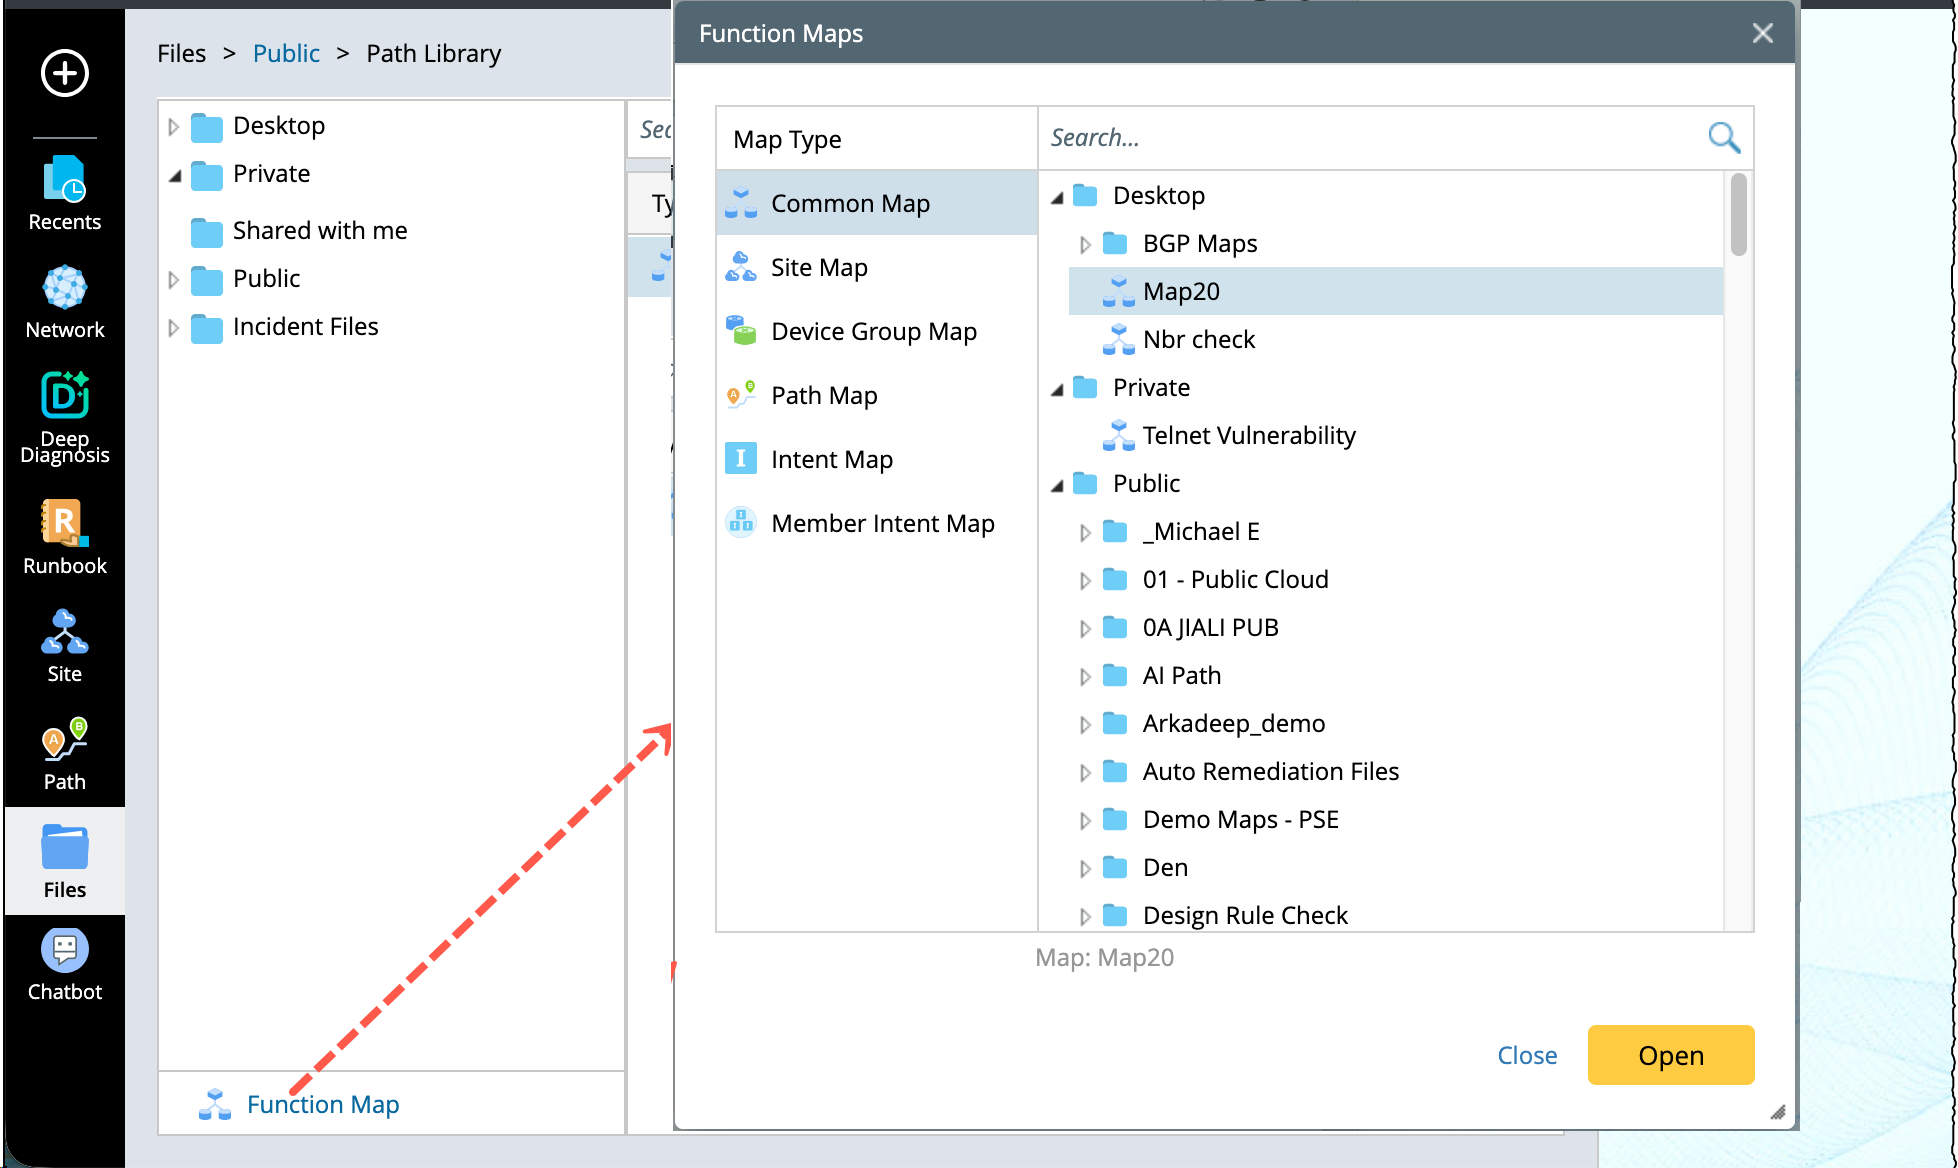
In the Function Maps window, the following actions are allowed:
- Search a map: Enter a search keyword in the search bar in the right pane to search for the matched maps.
- Open a map: select a map in the right pane, and then click Open.
See also: